
How to Use Trello for Effective Project Management: The Complete Guide in 2025
February 14, 2024 · 10 min read
Wondering how to unfold project management in Trello? By following these steps, Trello can help manage your projects more effectively, ensuring that all tasks are tracked, and team collaboration is streamlined:
- Create a New Board: Start by creating a new board for your project.
- Add Lists to Represent Workflow Stages: Set up lists to represent different stages of your workflow.
- Create and Organize Cards: Within each list, create cards for each task or action item. Provide detailed descriptions, checklists, due dates, and attachments as needed. Assign tasks to team members by adding them to the cards.
- Utilize Labels and Tags: Use labels to categorize and prioritize tasks.
- Set Up Due Dates and Reminders: Add due dates to each card to keep track of deadlines.
- Incorporate Power-Ups: Enhance your board’s functionality by using Trello’s Power-Ups.
- Collaborate and Communicate: Use the comment section on each card to discuss details, share updates, and ask questions. Mention team members using the @ symbol to notify them directly.
- Monitor and Adjust: Regularly review the board and adjust as necessary.
Ready to learn about every step in detail? Then, let’s dive in!
What is Trello?
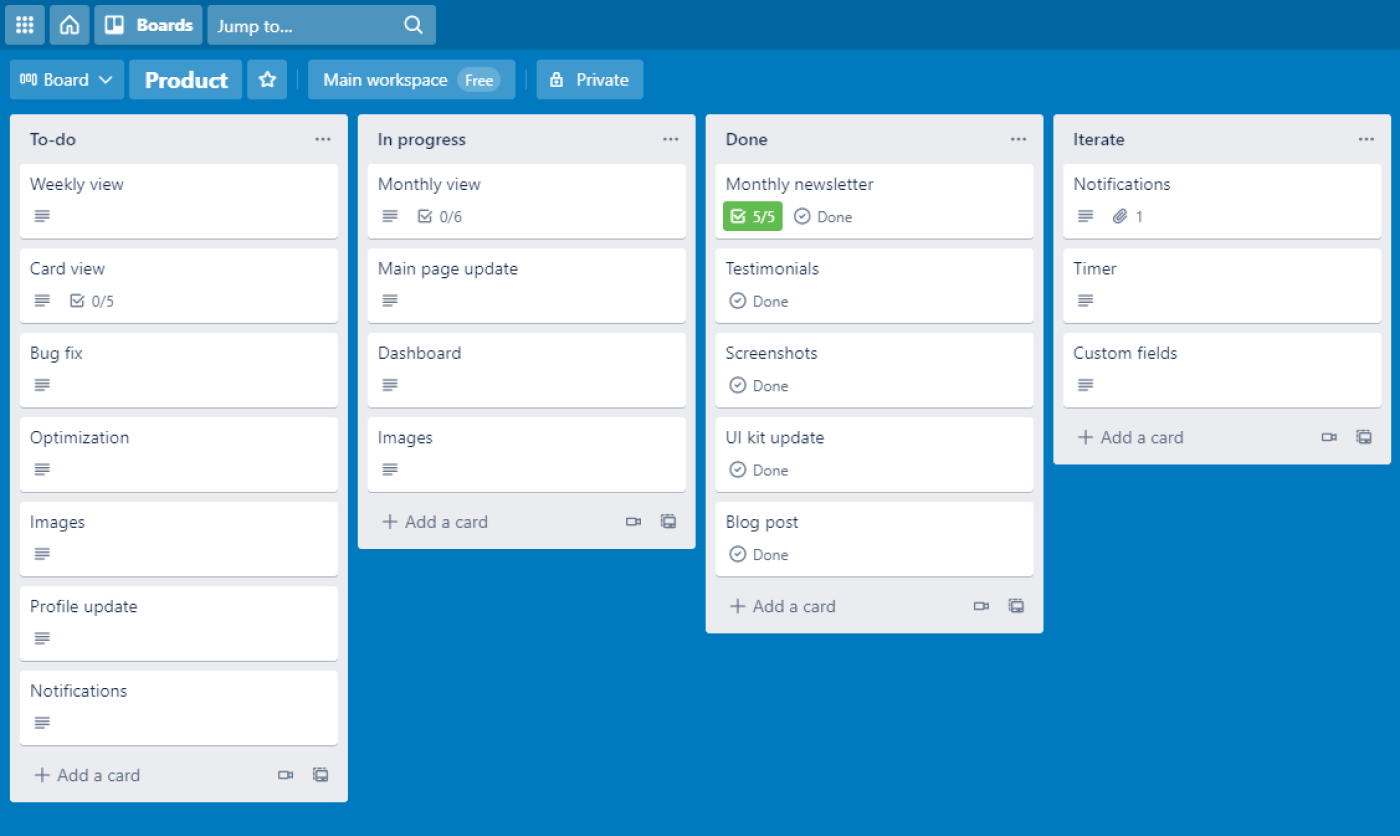
If you are new to the tool, let’s have a quick intro. Trello is sort of an online whiteboard consisting of lists and cards. Briefly, that is it. Sounds too basic? Well, Trello is built on the idea of full visibility across tasks and projects and the ability to reorganize them according to your priorities. Therefore, each Trello card stands for tasks, notes, projects, clients, etc. (whatever meaning you infuse them with) that you can visualize on your board and use to manage further.
Cards are supposed to be organized into lists that can also be used for various purposes: reflecting statuses, projects they’re referring to, people responsible for them, clients, and so on. The list structure is easily adaptable to any circumstances and can be rearranged at any time depending on your needs.
Is that it? Certainly not. Except for just a task name, there is so much more hiding inside each card that makes this whiteboard a true task management platform.
Trello Basics
When you are just getting started with the new tool, it’s helpful to know what features are available so that you can rely on them when building your workflow. As mentioned above, the biggest part of Trello functionality lies inside the card:
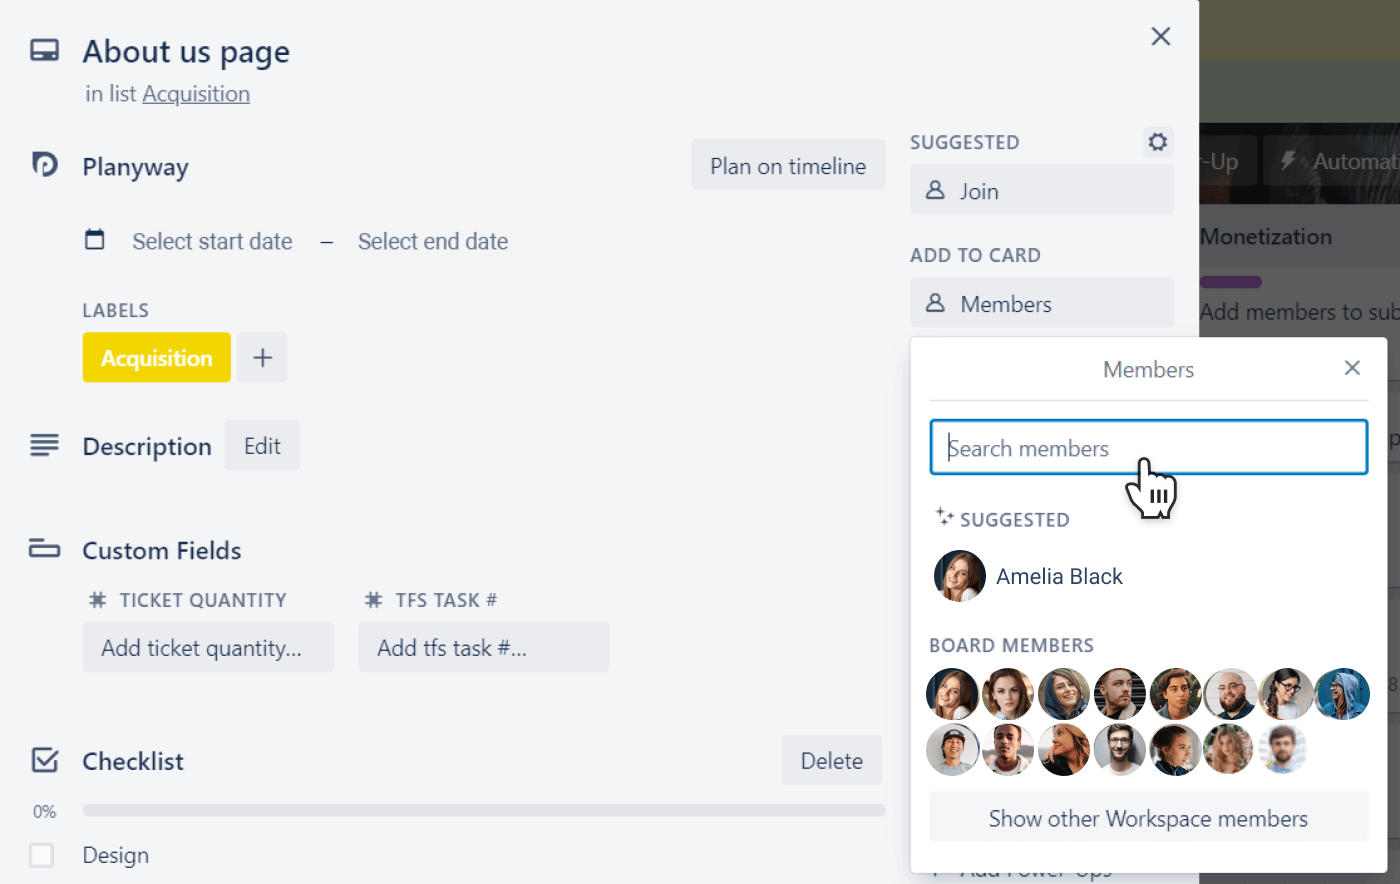
Members
Trello is not only about planning, it’s also a collaborative tool. Invite your teammates to the Trello board, so that everyone will get access to the board to see and, if you permit, even edit it. Then, delegate tasks to responsible members which will help your team know what you expect them to do.
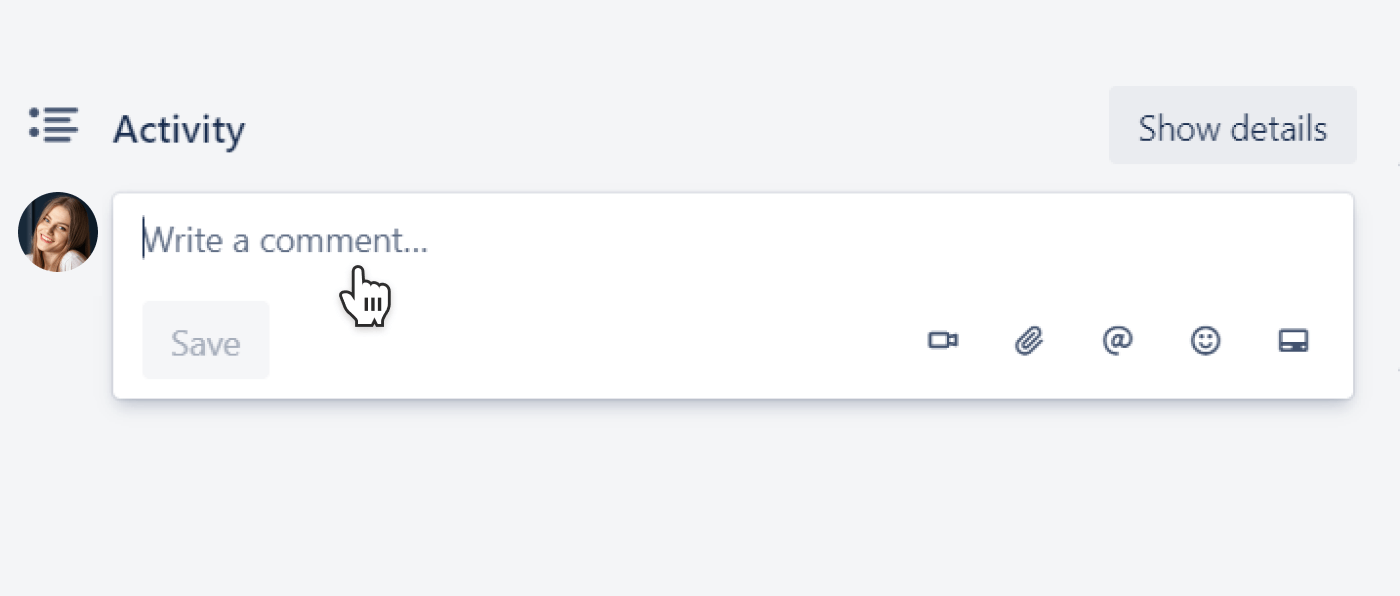
Comments
Comments will help you improve communication in your team. Leave feedback, ask questions, have discussions right in the task card, so everyone stays in context, and in case you need to check what you were talking about, you can always refer back to the card, so nothing is lost.
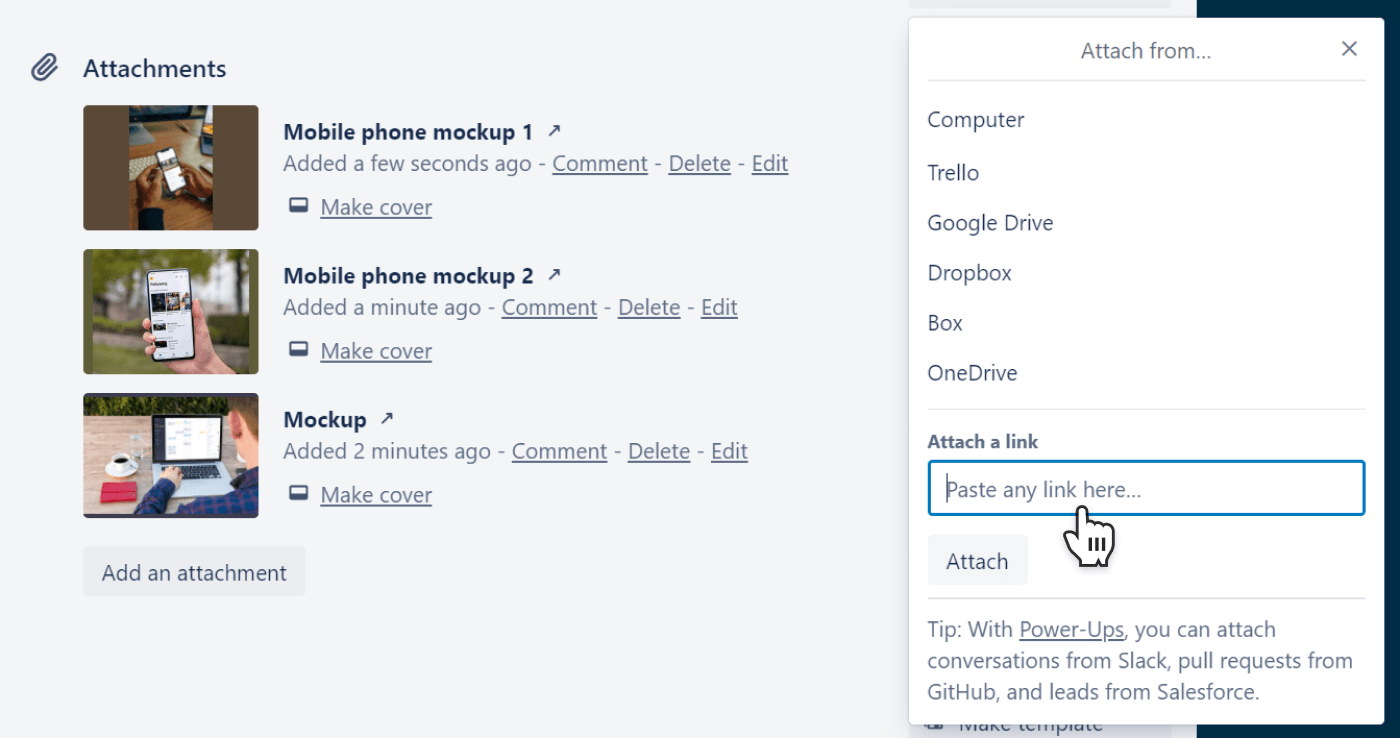
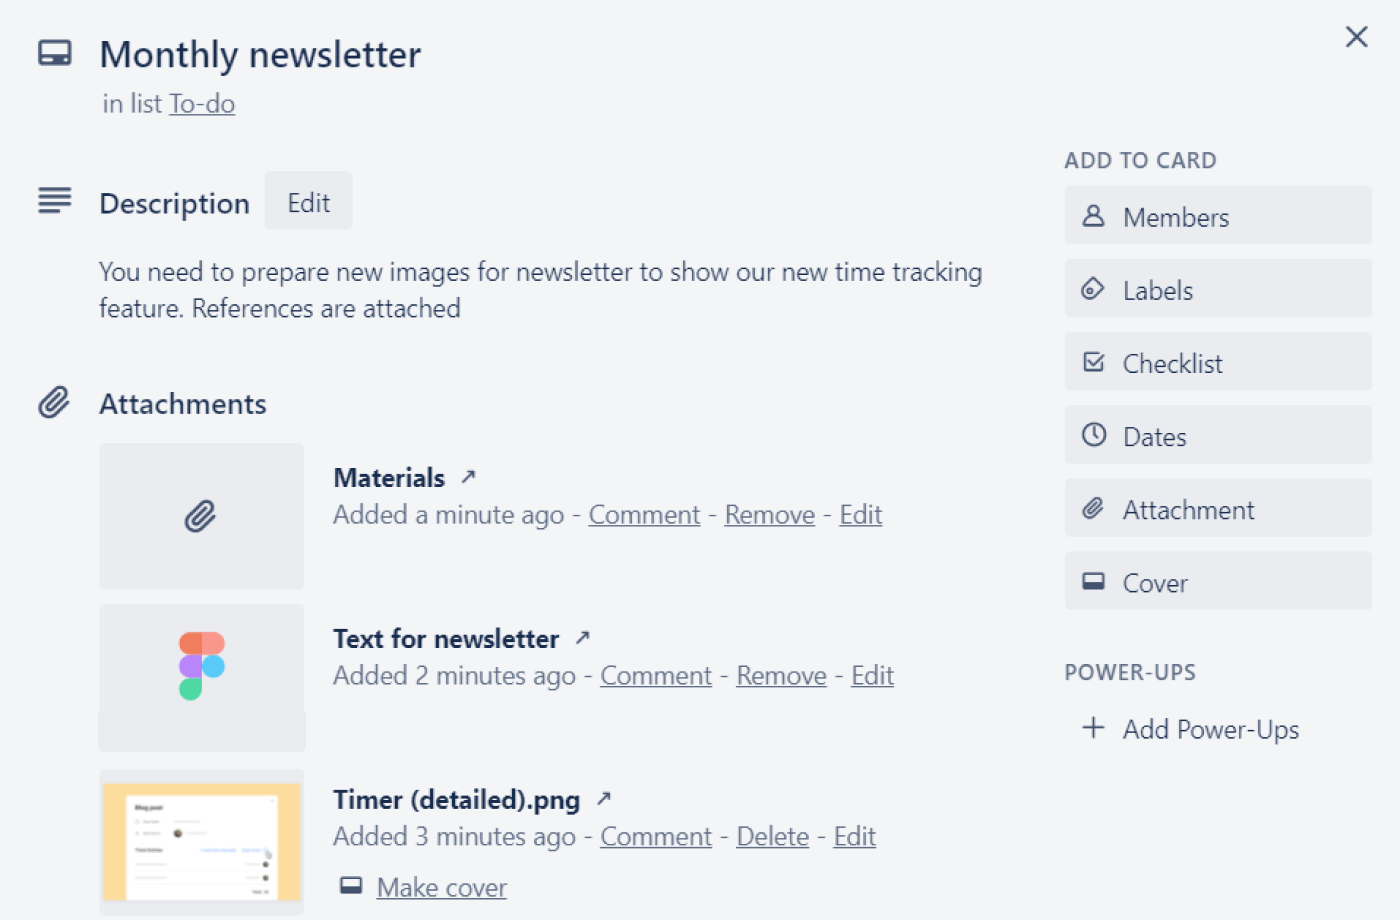
Attachments and Description
To provide more details about the task and results you get after it’s complete, make use of attachments and descriptions. Task explanation, necessary details, relevant files, and links will be stored in the card, so you can access them anytime you need, without wasting time on the search.
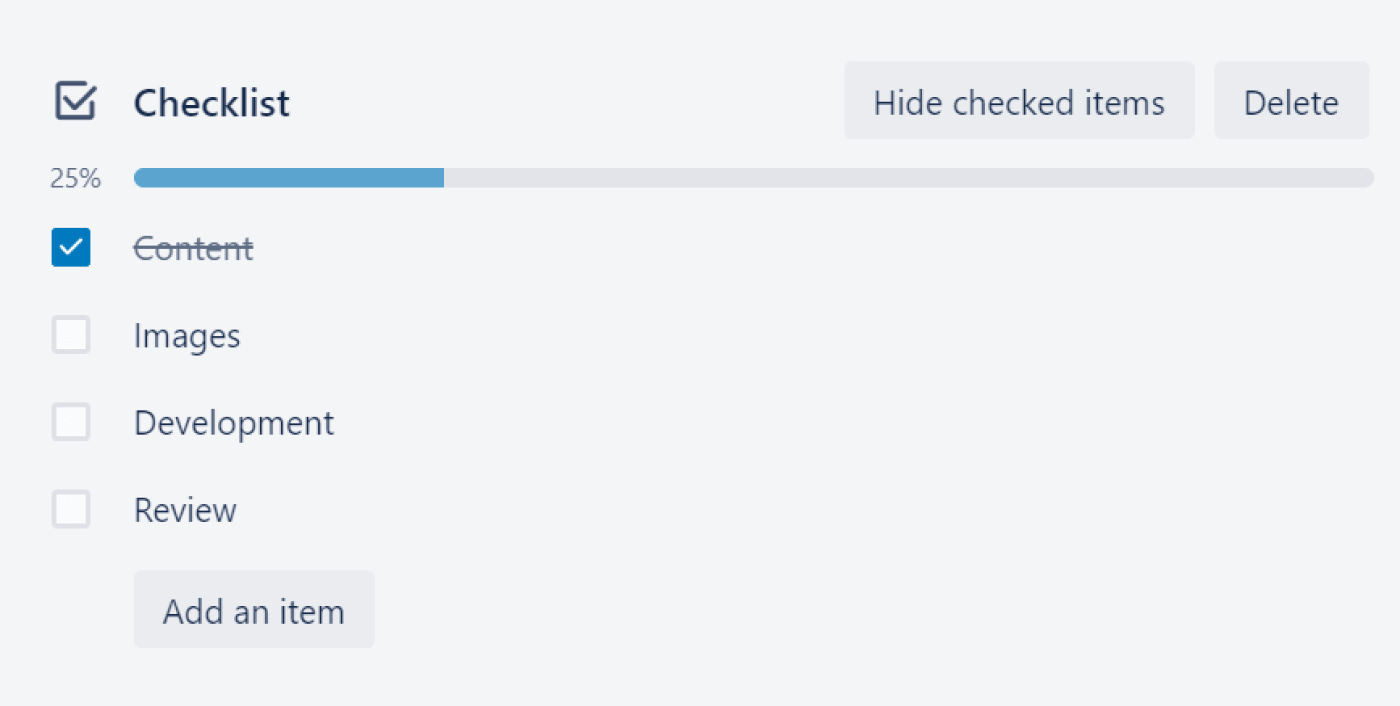
Checklist
Checklists give you more detail. It’s a very common situation when there are certain steps to be undertaken to complete the task. By listing them, you make people aware of what steps their work consists of. Plus, they can easily play the role of subtasks.
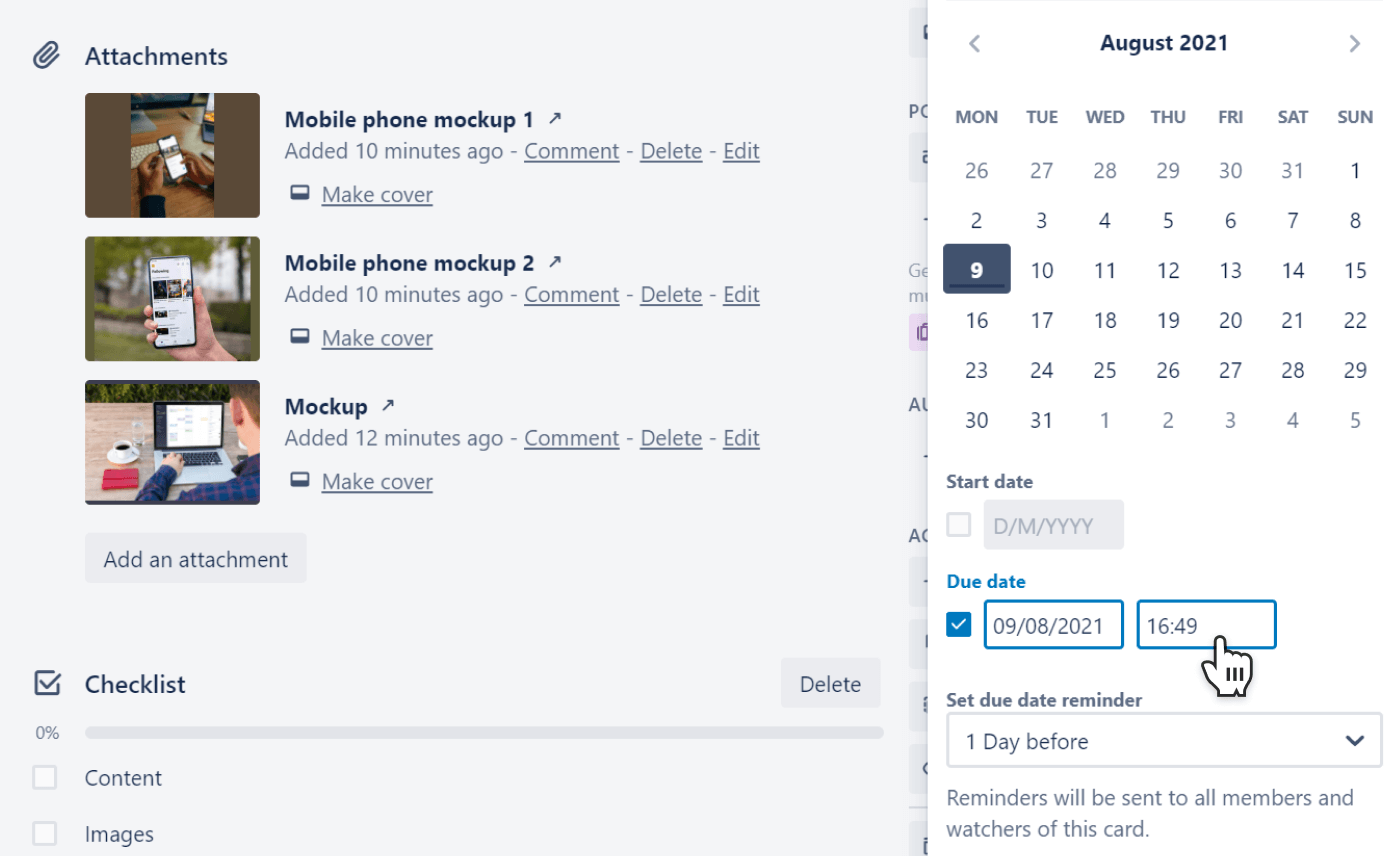
Dates
When managing a project, deadlines are important. So, Trello allows you to add start and end dates to cards, so you can see when the deadline is coming.
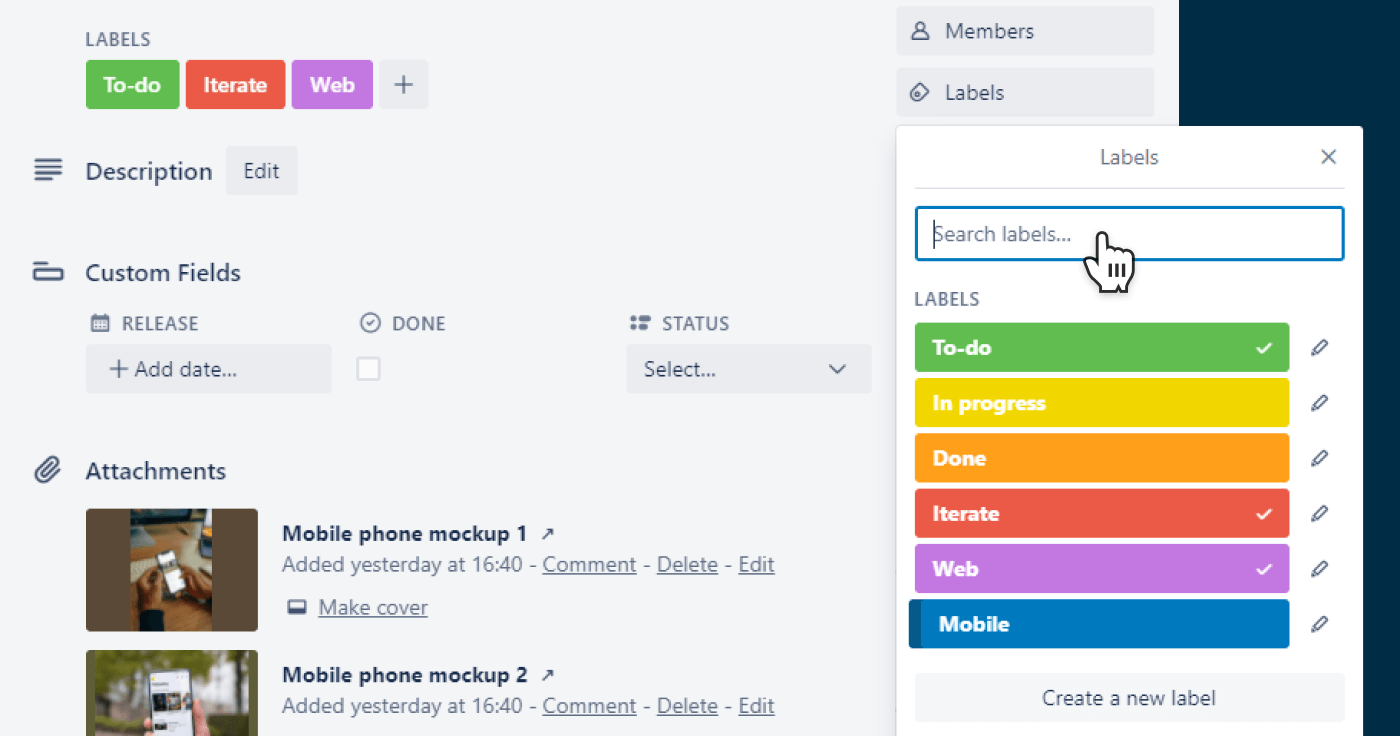
Labels
Labels provide you with additional visualization. Represented by different colors, you can give them your own name and then label your cards with them. Labels are used to add additional context to the card, e.g. type of activity, the client you’re doing this work for, the department responsible for it, status, etc.
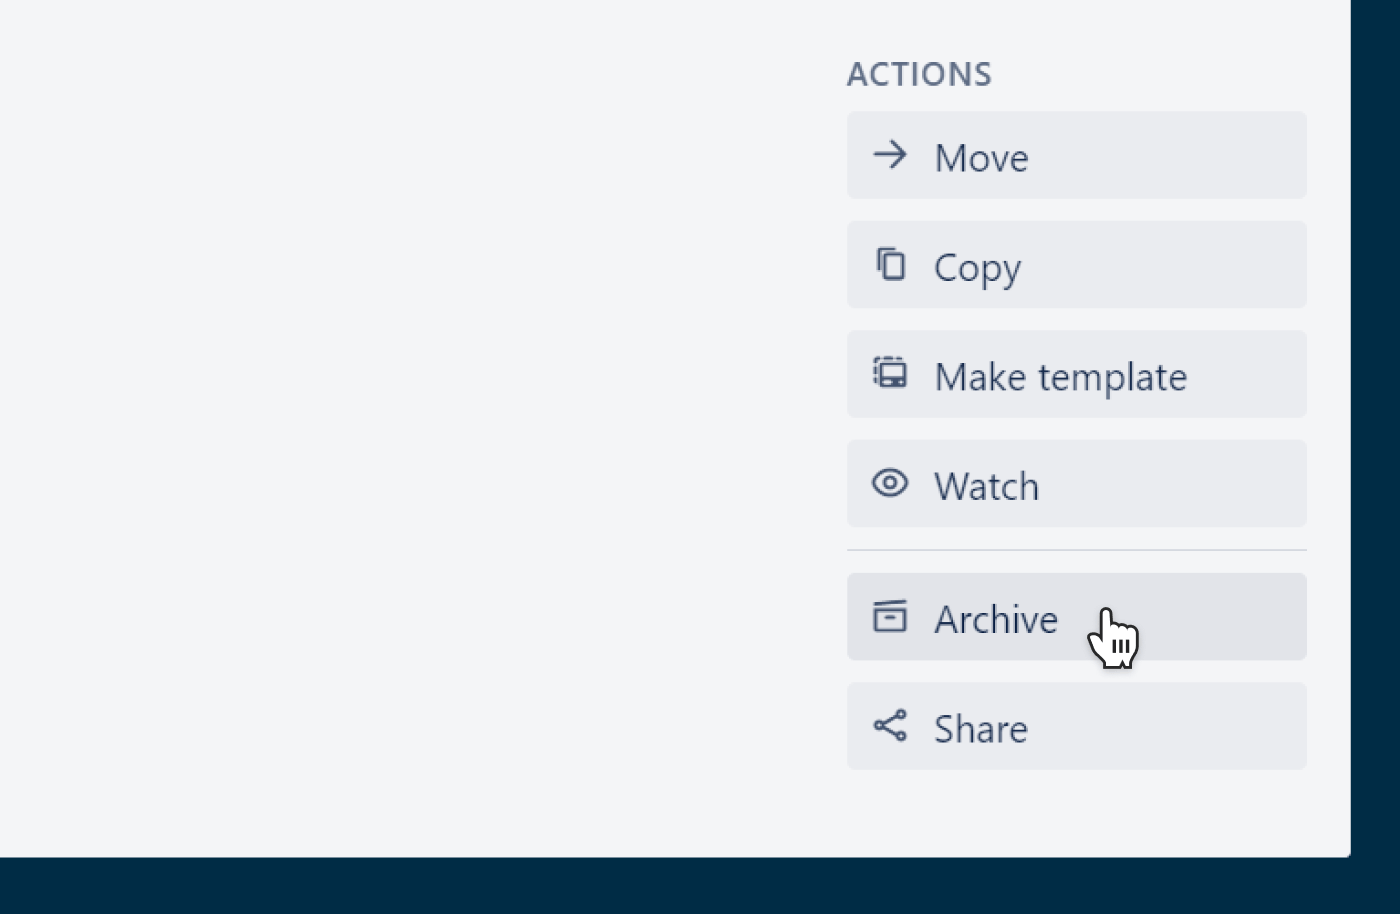
Archive
Once the task is done, you can move it to the Done list or not to make your board overcrowded, archive it. In this case, the card will disappear but still be possible to restore.
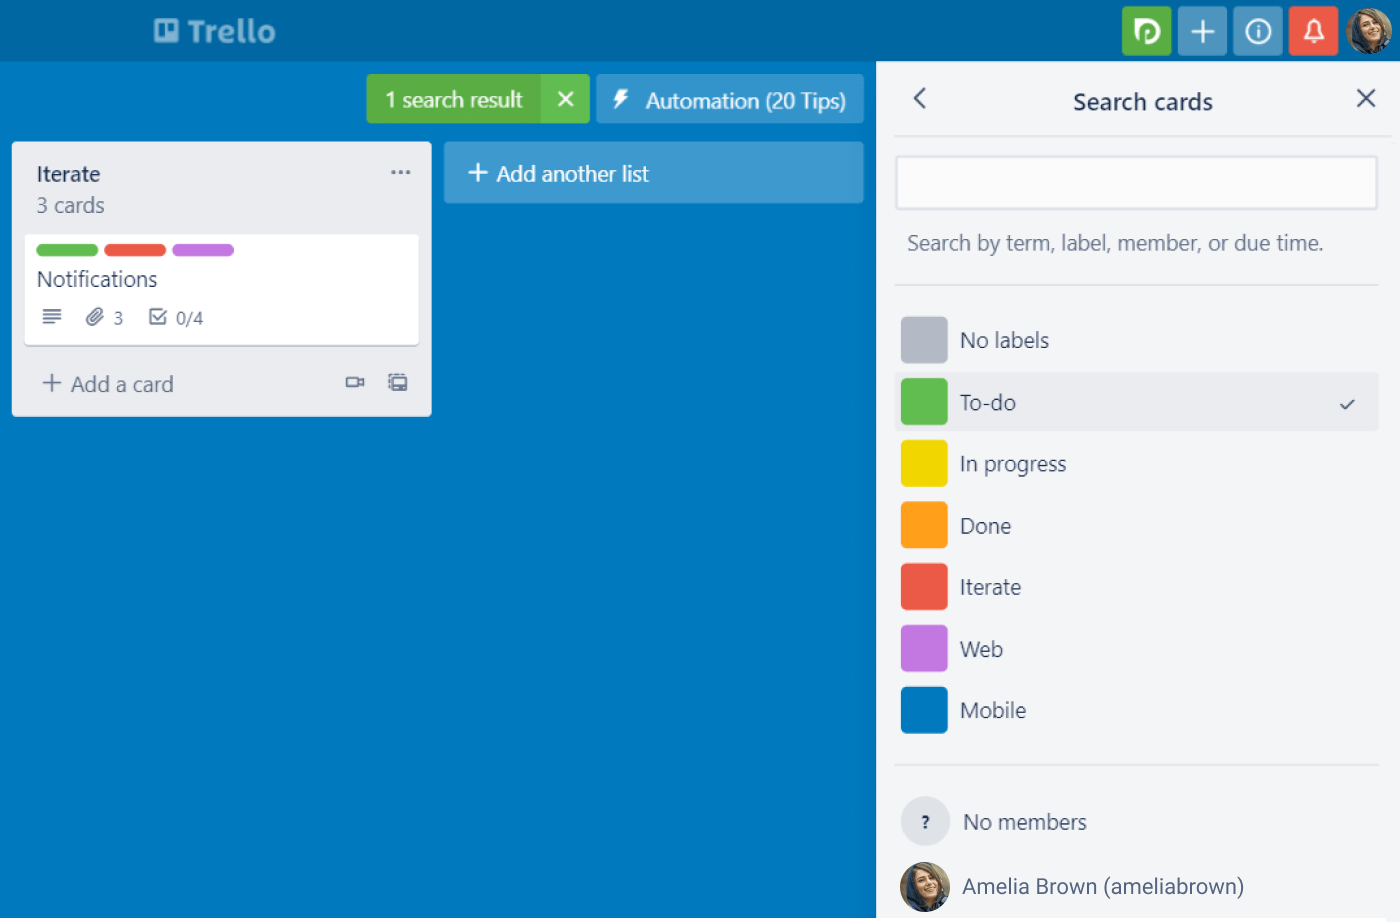
Search
To navigate easier between cards, there is a search option. It can filter cards by different criteria, or you can just start typing the card name to see only things you want to.
What is Trello Used For?
Trello is not tied to any specific industry and can be easily adapted to any field you’re working in from software development and professional services to marketing and design. Another advantage is that it doesn't matter whether your teammates are sitting at the next desks or working remotely around the globe. Trello will play the role of the collaboration space and unite everyone under the same roof wherever your team is.
As Trello is well-suited for Agile methodology, it’s a perfect tool to build a scrum board as well as apply the Kanban workflow. Your board will show you what is planned to be done, task statuses, and help you indicate potential bottlenecks. But since Trello has lots of various powerful power-ups, you’re not limited to this structure and can transform it to other viewing options anytime.
How to Use Trello for Project Management?
Once you’re aware of basic functionality, it’s time to focus on using Trello for project management. Whether you are launching a new product, designing a website, or organizing a conference, your project always goes through the same stages: initiation and planning, implementation, and closeout. Let’s briefly see what’s involved in each phase and check the ways how Trello can be used to roll out all these stages:
1 Planning Stage
The planning phase serves as a takeoff strip for your project. That’s the moment you have to pay lots of attention to as the planning process lies at the heart of all project activities and guides everyone on how to undertake it. The planning stage is where you set up goals and objectives, identify stakeholders, determine scope and requirements, distribute resources and finally get the plan of action.
Define Project Scope
Well, when you just get started with planning you have nothing but the blank board in front of you. But prior to filling your board with tasks to do, make sure you’ve collected all requirements from the stakeholders. Only then, you may get down to defining the scope which is a crucial step because the scope will serve as a foundation of your plan.
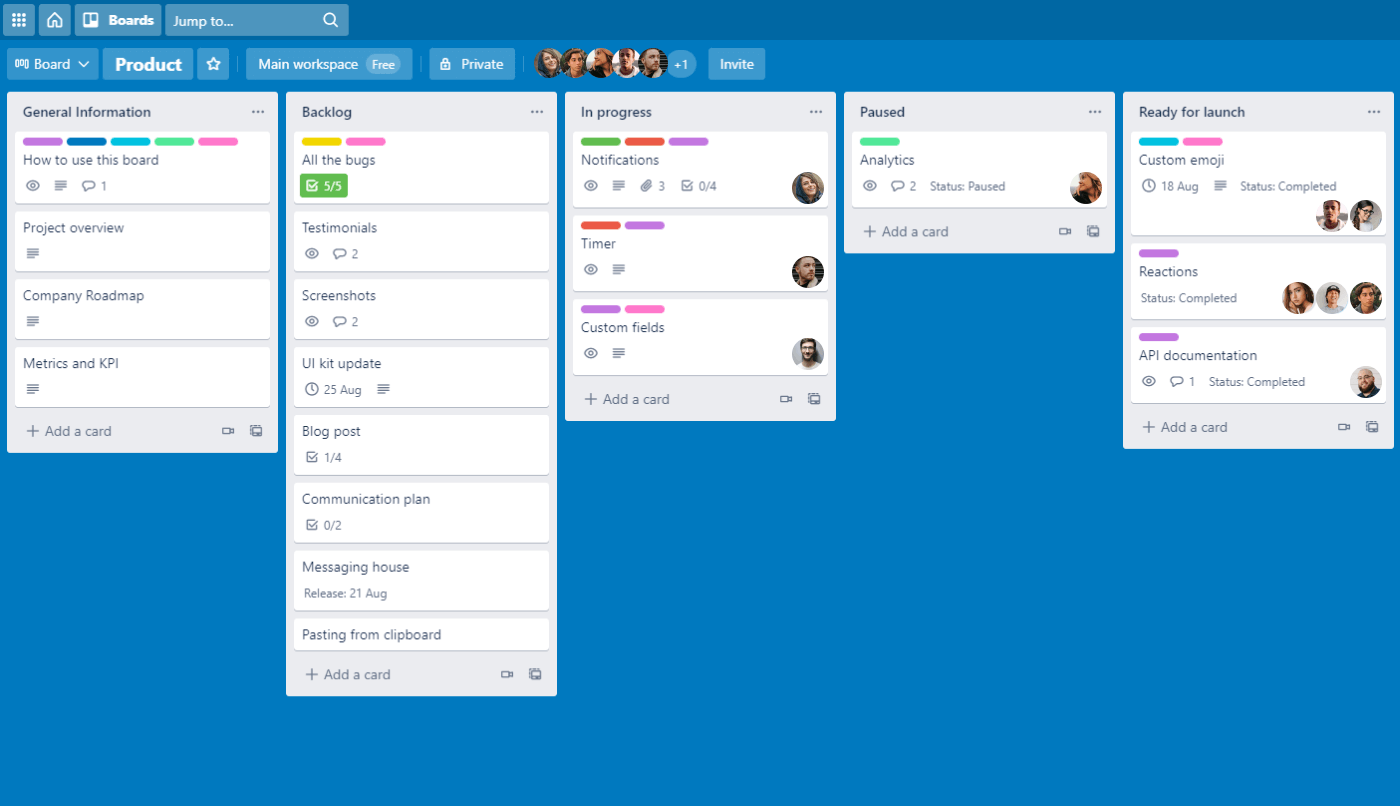
Organize Board
Now that you have the scope of work in mind, fall on building your plan draft. Split your board into lists. What’s the best way? Actually, when you’re creating lists ask yourself: “What are the different steps of our process?” and make lists based on your answers. The subsequent lists are the most common workflow backbone: Backlog, In Progress, Paused, Ready for launch, etc., but you can easily adjust it to your workflow.
Before the scope of work is transformed into Trello cards, we recommend making a list with the general information to give context to new members who don't know the project details and the background. In case your cards have a certain repeating structure, it also makes sense to create task templates and keep them in this list, so it’ll be always at hand.
Prioritize Tasks
Then, it’s the right time to place tasks on cards and prioritize them. Don’t forget that Trello lets you work on different levels by using checklists inside cards. They will help you go more granular, and list steps that should be taken to perform a task.
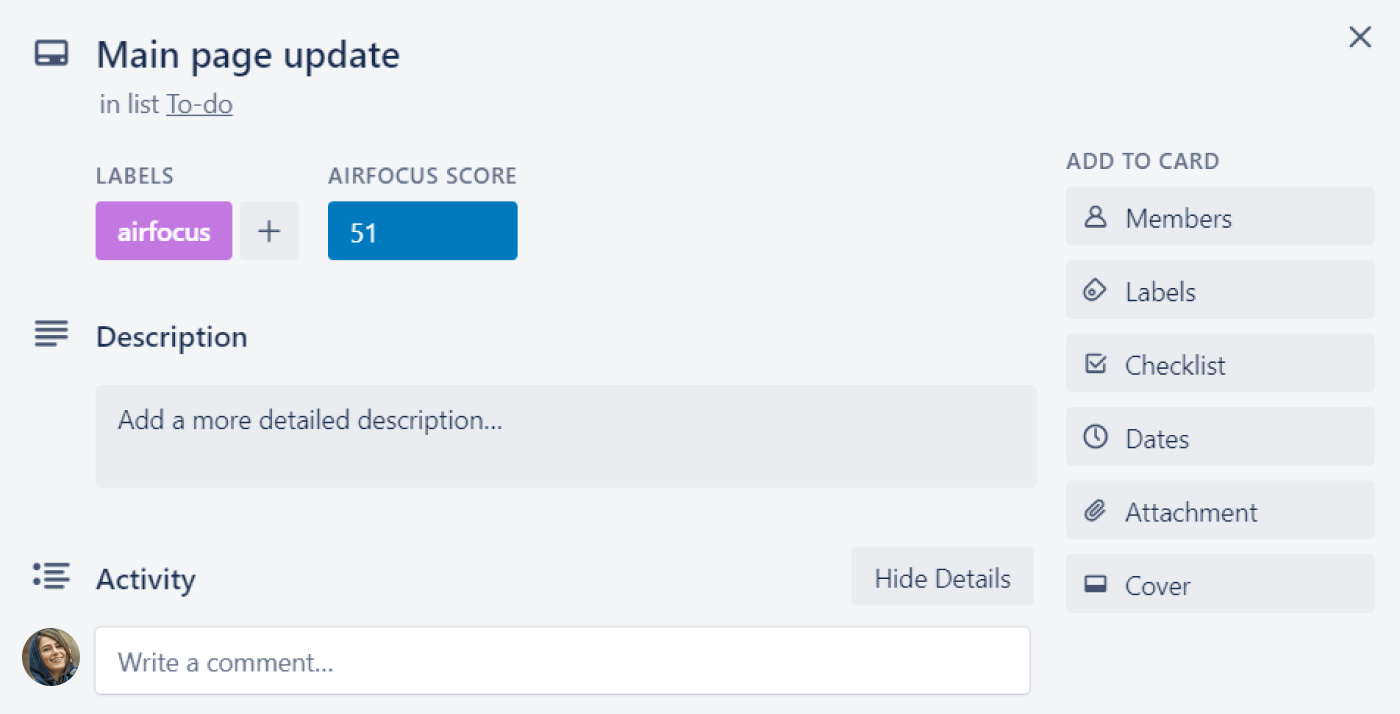
The prioritization method available in Trello by default is card reordering, which means you need to move cards one above another. Depending on the project, you might have hundreds of cards, which makes this method too complicated and hard to decipher. Here’s the point when we’d like to introduce the first improvement for Trello.
The Airfocus power-up allows you to use their framework to score tasks and then visualize this scoring on the card covers, so the team gets what’s most important at a glance and can save time on deciding what to work on next.
Schedule and Allocate Resources
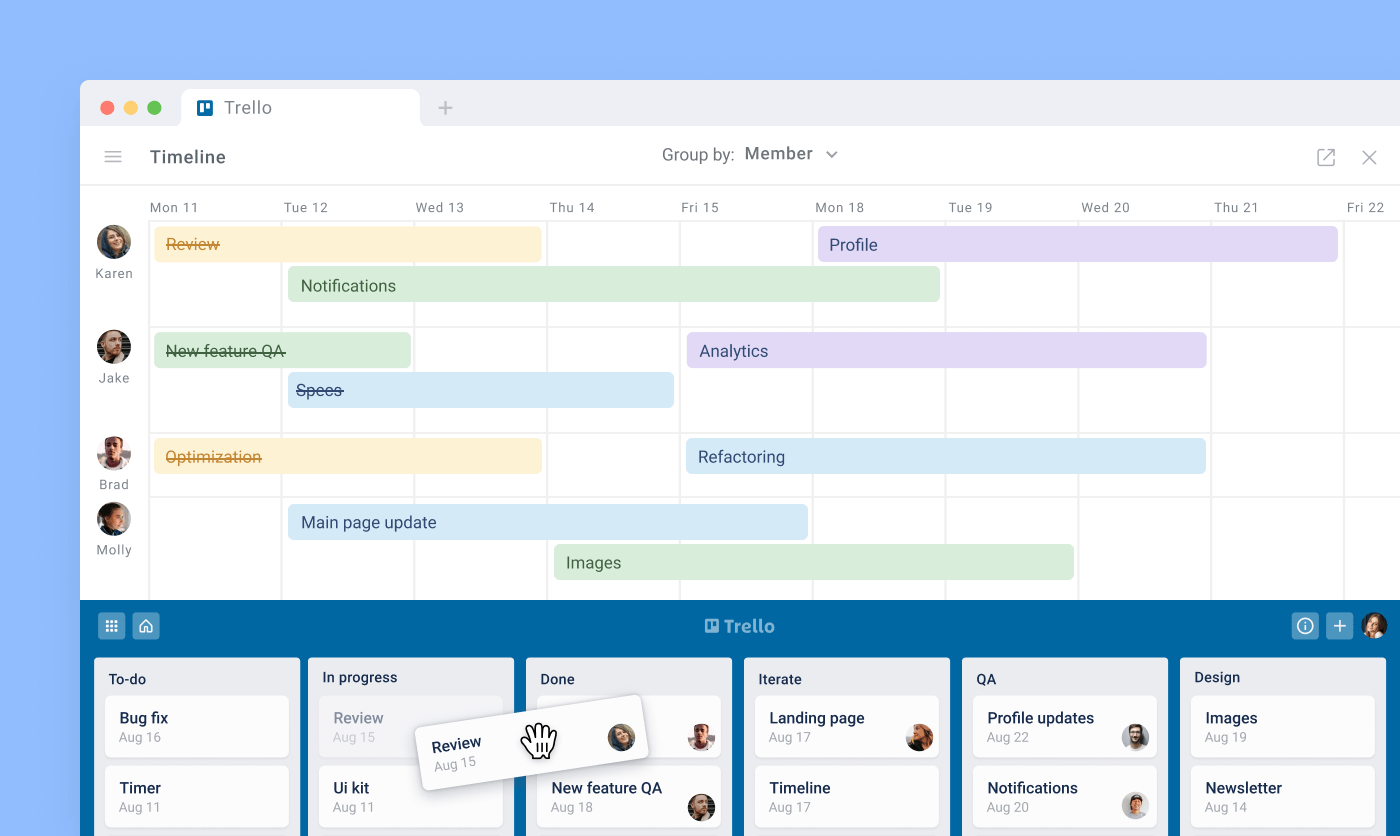
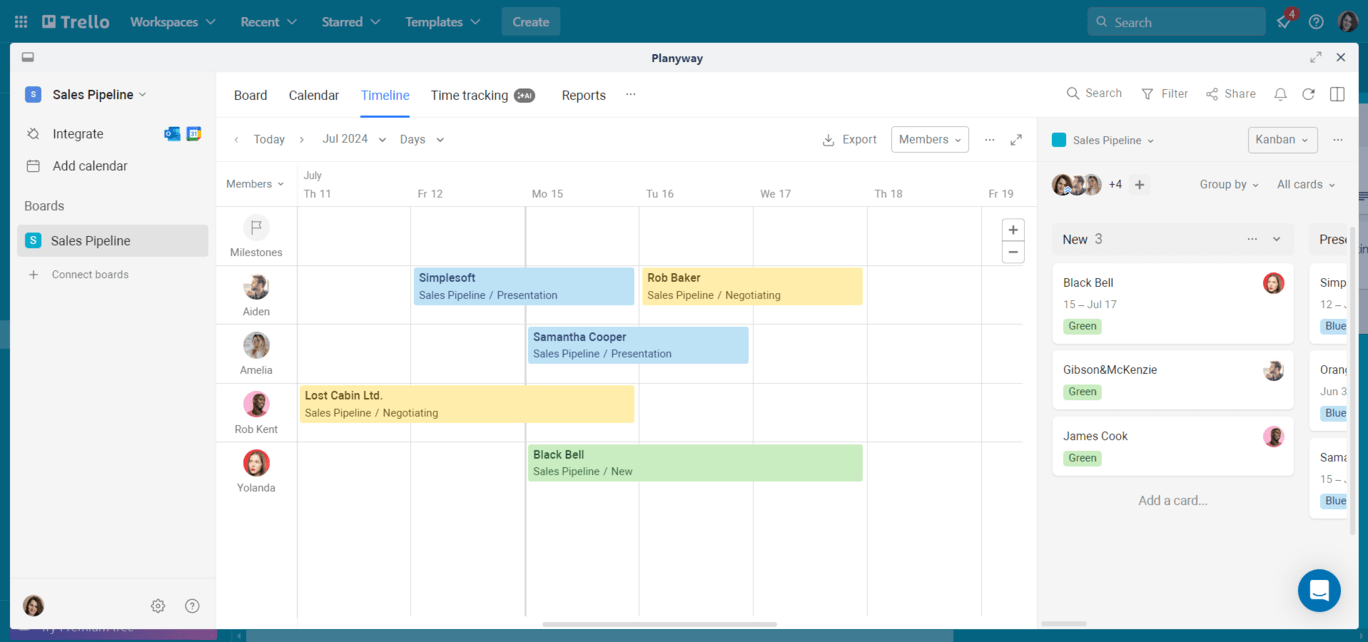
Once priorities are set, let’s move to project scheduling and allocating resources. This part is the most challenging one in Trello, as it requires more visibility than the basic Trello can offer. That’s where Planyway comes into play. This power-up provides you with multiple views like calendars and timelines with various groupings: by team members, boards, lists, and labels.
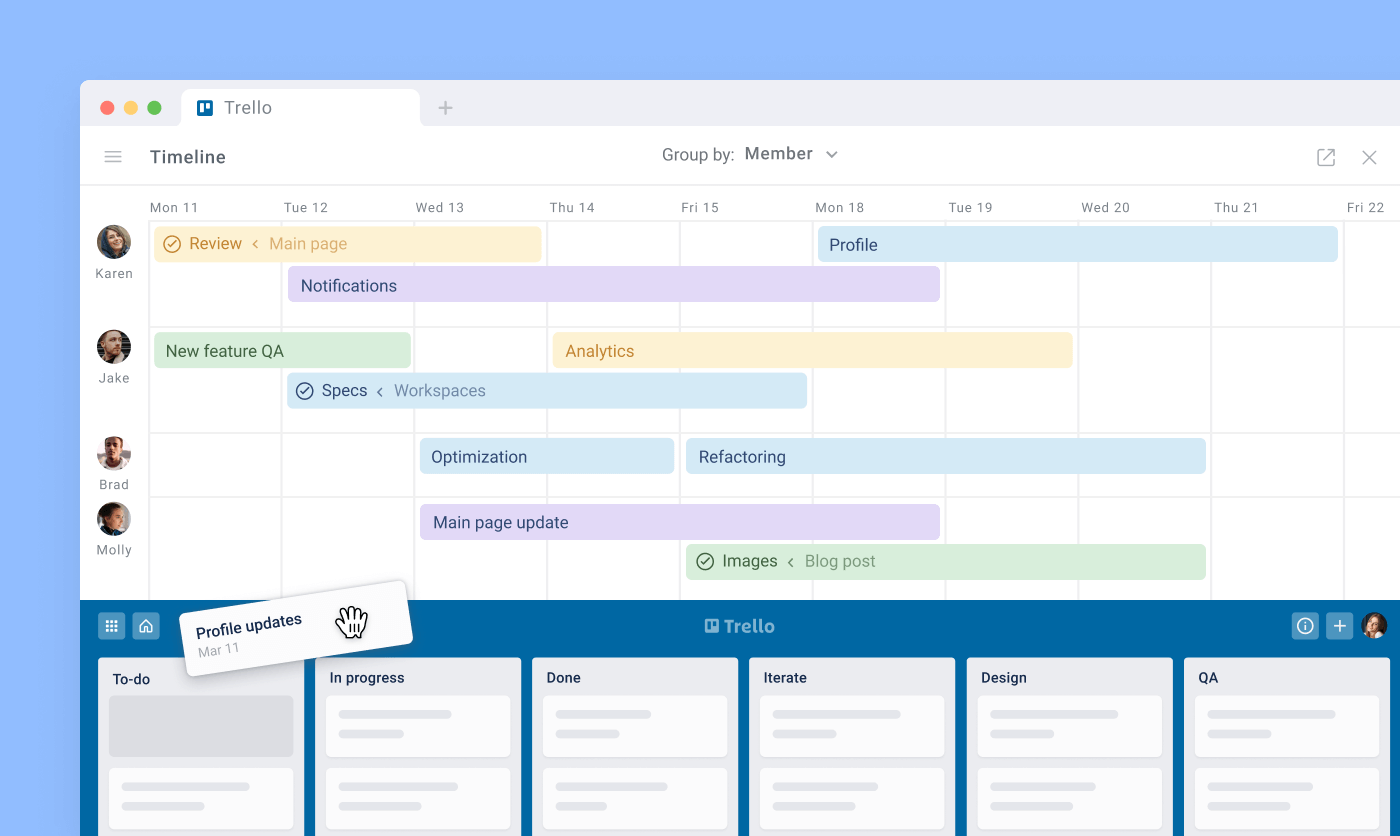
The tool lets you schedule tasks just by dragging them to the timeline and setting up the card duration based on your estimate. As well as regular cards, checklist items can also be scheduled, which makes it possible to work on different levels.
The team timeline view will help you schedule tasks based on team workload. Once the card is dragged to someone's lane, it’s assigned to this person straight away.
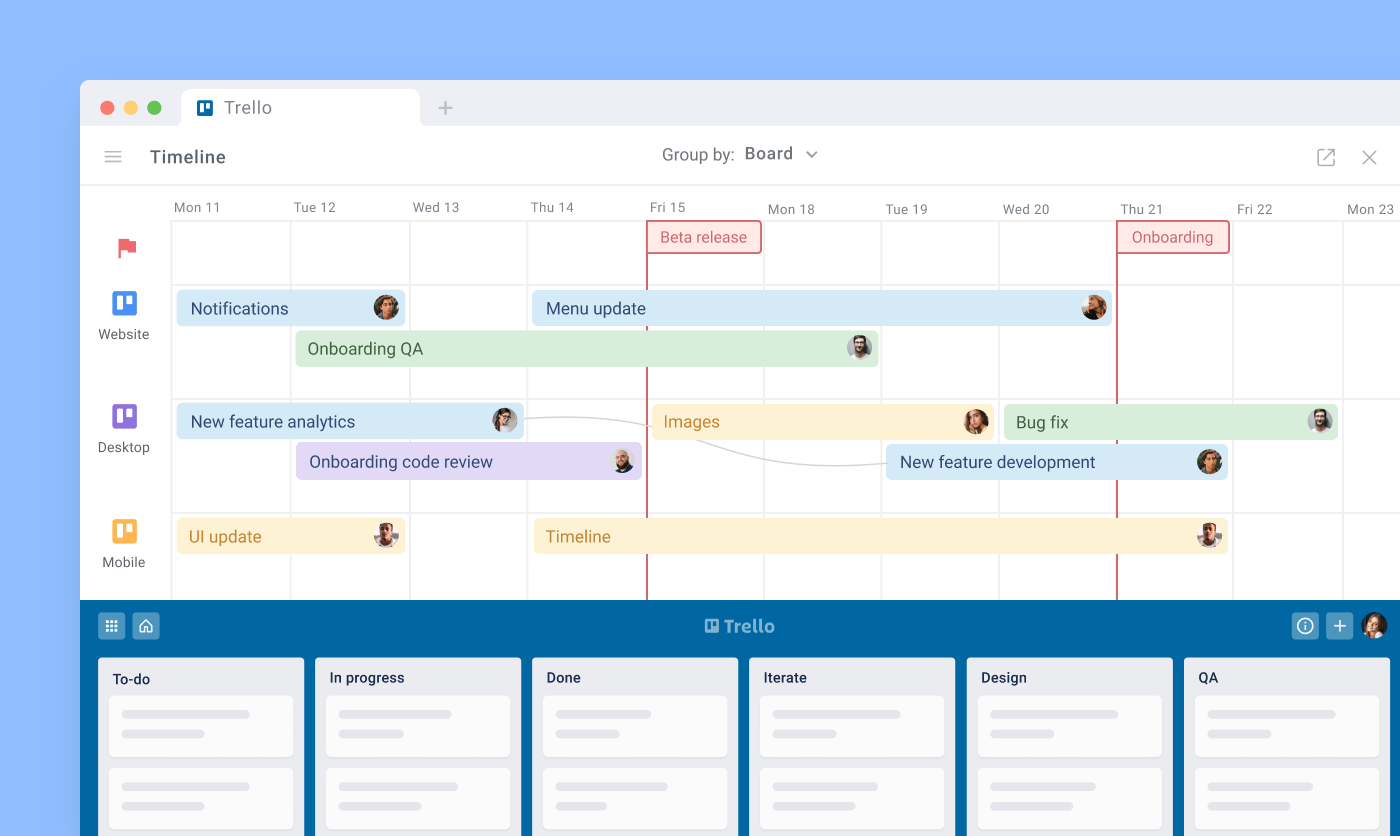
Along with scheduling and allocating resources, Planyway can help you show dependencies between tasks, visualize milestones and work on multiple boards at the same time.
Once dependencies are mapped, you can use the Planyway power-up to create a Gantt chart. This visualization will show the timeline for each task and highlight the critical path — the sequence of tasks that directly affects the project completion date. Regularly update the status of each task to ensure the timeline reflects the current progress and adjust the plan as necessary to stay on track.
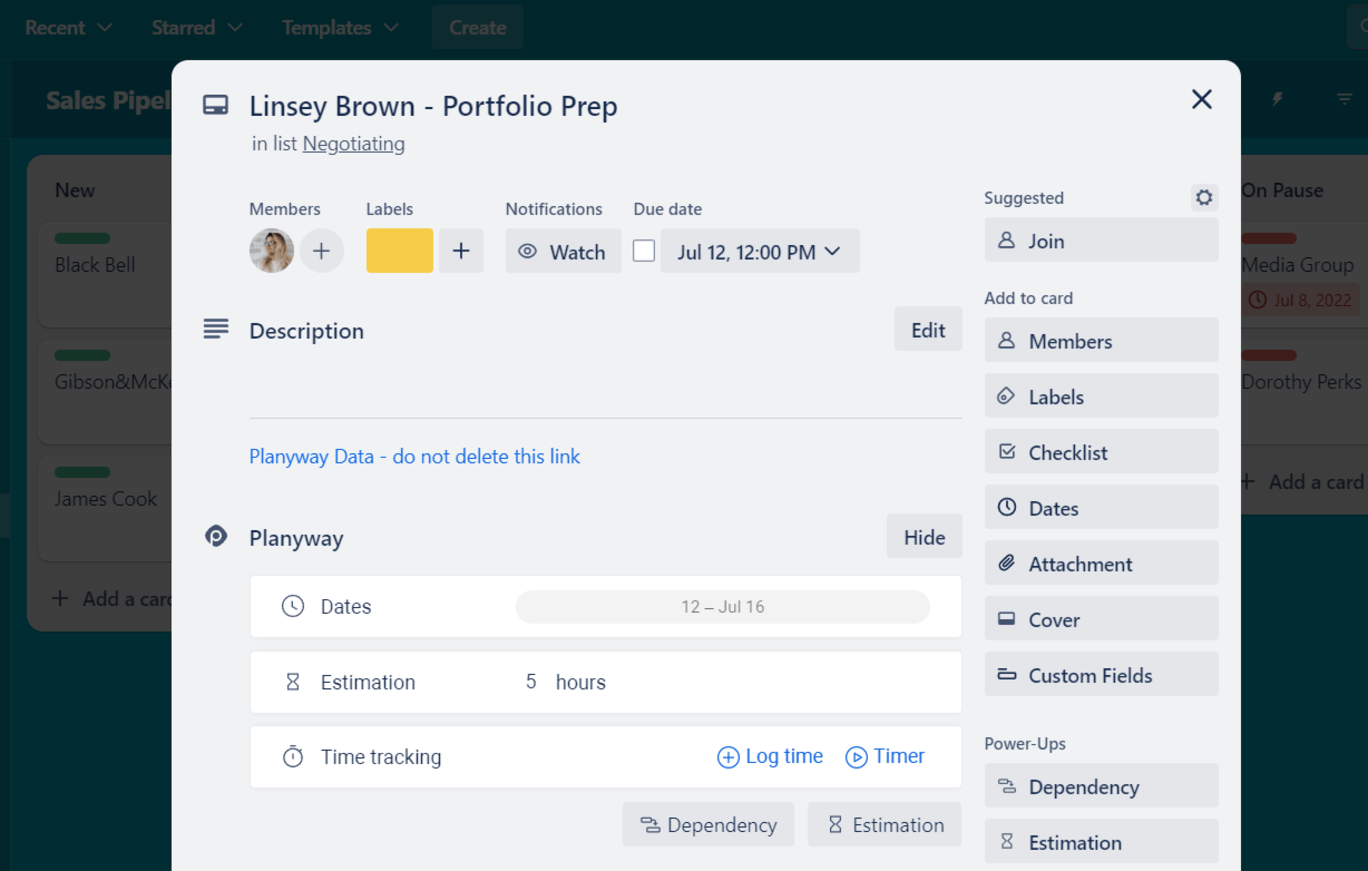
Accurate task estimation is vital for successful project management. Use the description or custom fields to add details and attach relevant documents. What’s more, with Planyway power-up you can get the estimation field inside a card that can be used further in the report to compare actual time spent and the estimation.
This way your scope of work is transformed into a comprehensive plan in seconds granting you a clear and dynamic picture of the whole project.
Add Context to Tasks
Another crucial thing to do is to infuse cards with context. Remember that you’re doing this plan not just to know the order of work and understand who is responsible for what but to make sure the tasks are crystal clear for everyone who is going to work on them. Add more details, provide good descriptions, attach required files and links to make sure your team has absolutely everything they need to do their work well.
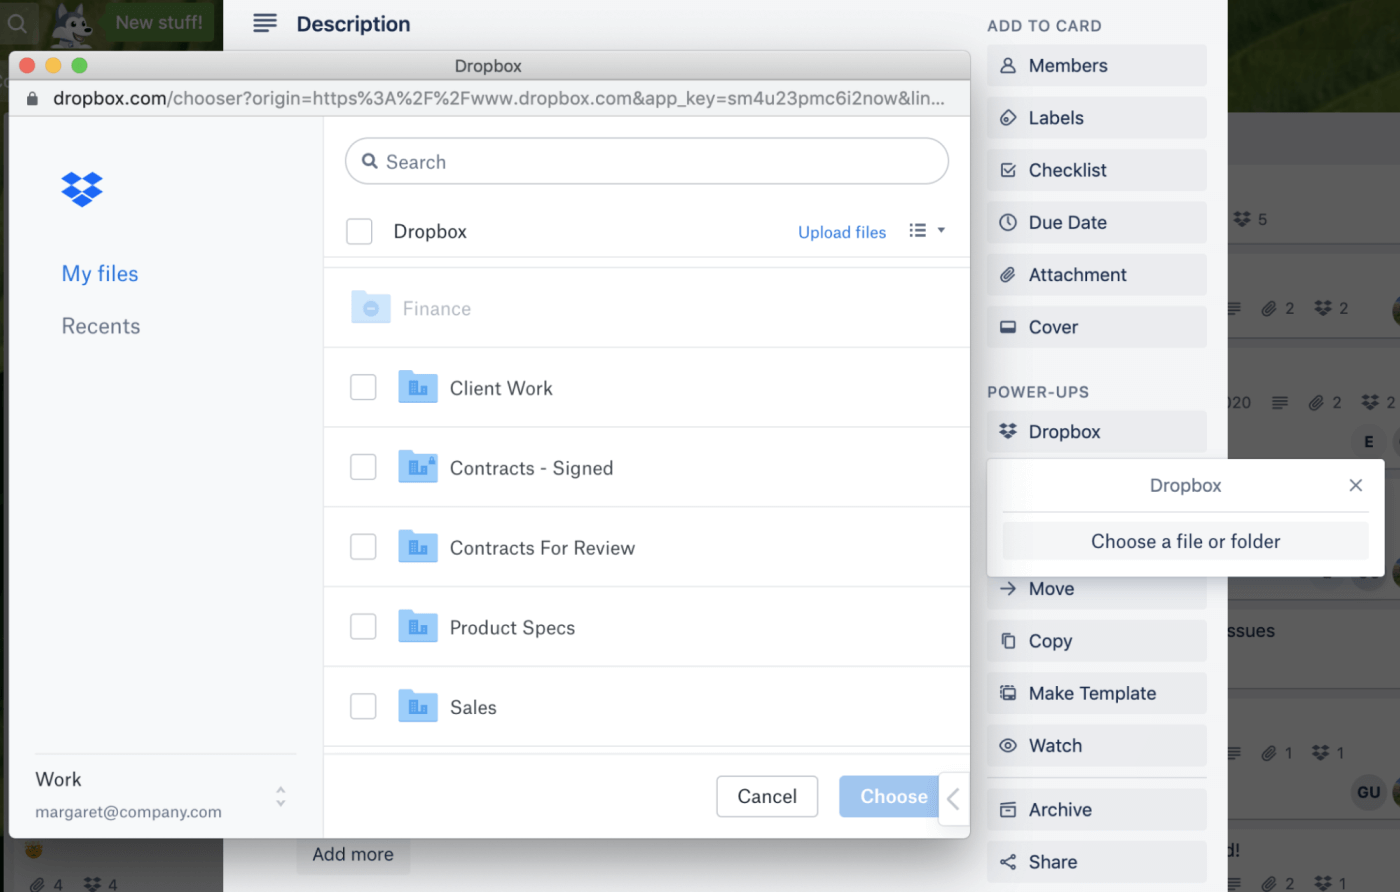
Like the extra help, you can make use of some helpful power-ups like Google Drive, Dropbox, etc. to browse files right from Trello.
Once the plan is set up and you’re ready to move to the implementation part, take a moment to discuss the plan with your team. Set up a kick-off meeting, so you have a chance to discuss your plan, explain your goals, review the estimations together, and answer all questions your team might have.
2 Implementation Stage
That’s the phase where the magic happens and all your plans come to life. You finally start to act, so the work gets done. During this phase, you have to focus your efforts on monitoring the work process and task statuses, budgeting, and certainly maintaining communication with your team and customer.
Monitor and Control
The simplest way to track how task statuses change is to move them from one list to another. Having Planyway adapted you have a better visual understanding of what’s in progress due to the timeline, and what’s done due to the Complete feature too.
Another way to track status change - labels. You can apply certain labels correlating with different statuses to your cards, then even filter cards by labels to see only tasks with certain statuses. With Trello automation, you can automate the process of switching lists when labels are changed.
Manage Costs
Budgeting is another important aspect, no matter if you are working on internal or external projects. To help you make sure you’re not exceeding the estimation, make use of time tracking. The good news - you don’t have to switch to another app and can leave it all to Trello. Actually, there are multiple standalone time tracking apps supporting integration with Trello but the main disadvantage is that you have to work with the second platform anyway which also adds extra cost.
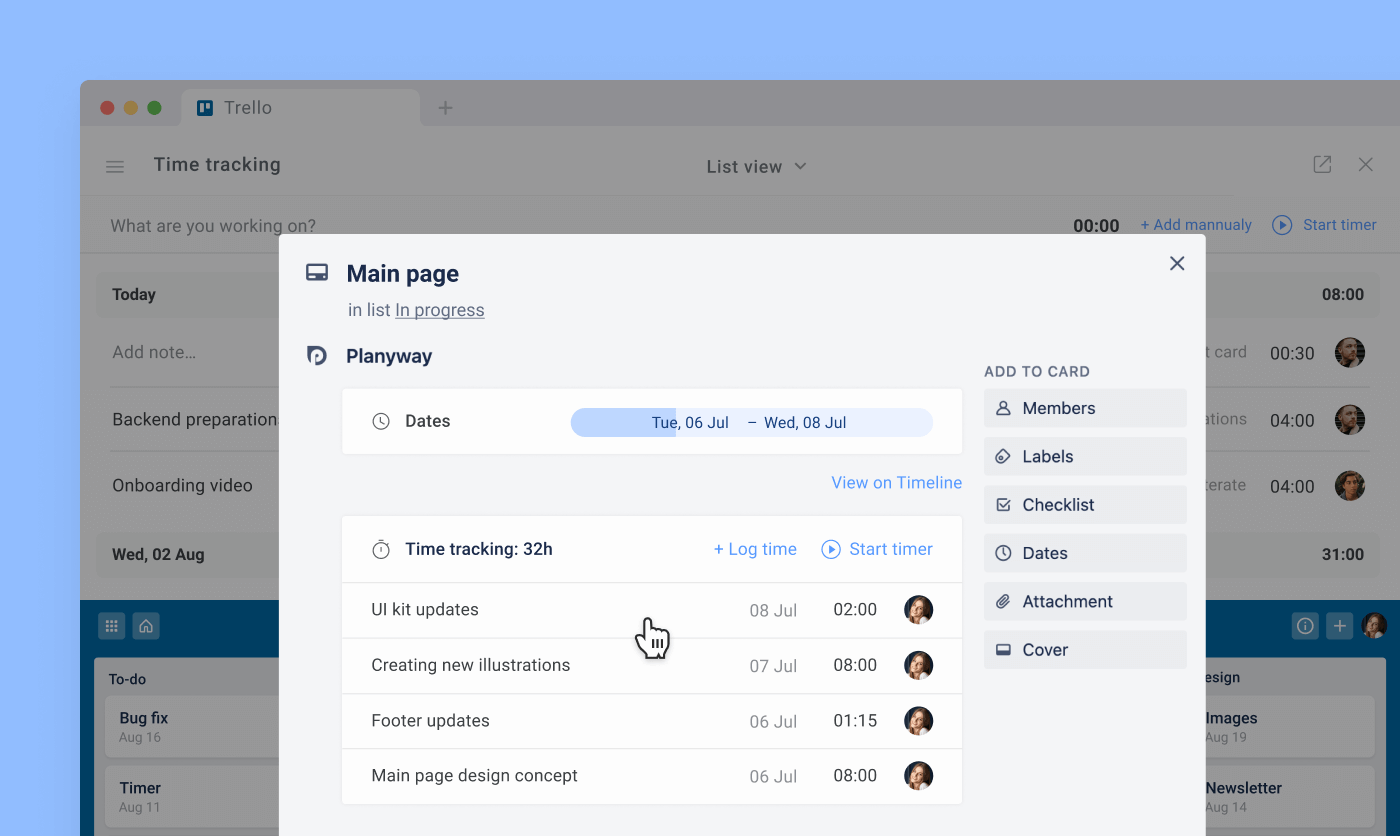
If you liked the idea of the Planyway planner, you can try out its time tracking. You get the option of recording time spent right inside the Trello card manually or with the automatic timer, as well as adding an additional estimation field helping you compare actual time vs your estimate. This data can be exported to the Excel format to have a performance Trello report.
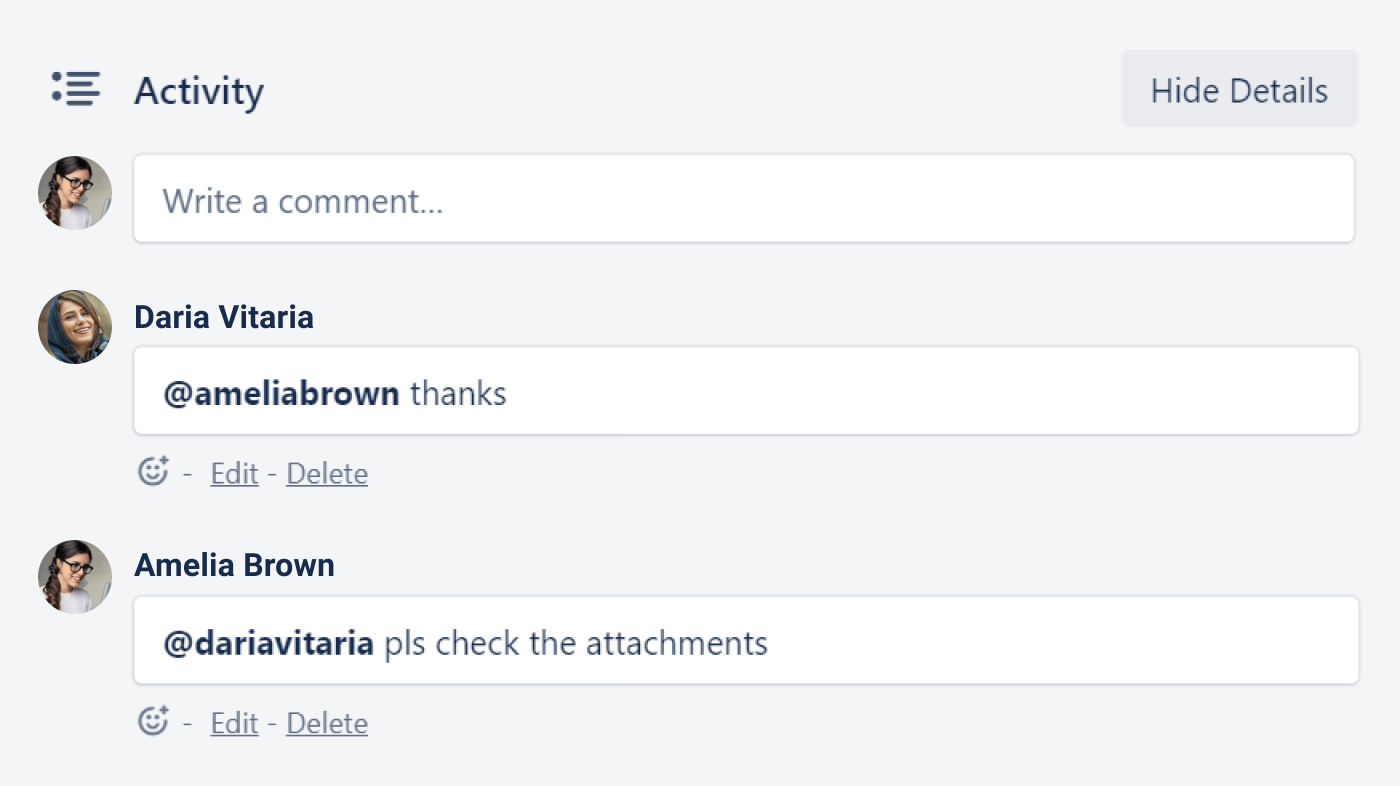
Communicate with Teammates
Communication is another big thing. You always have to keep a finger on the pulse and be able to throw a lifeline to your teammates. As you already know there is an independent way to hold communication with your team through card comments which is super-cool because all discussions happen task-related. Apart from leaving notes, asking questions, sharing feedback, etc., you can mention team members, so they get notified and can respond with no delay.
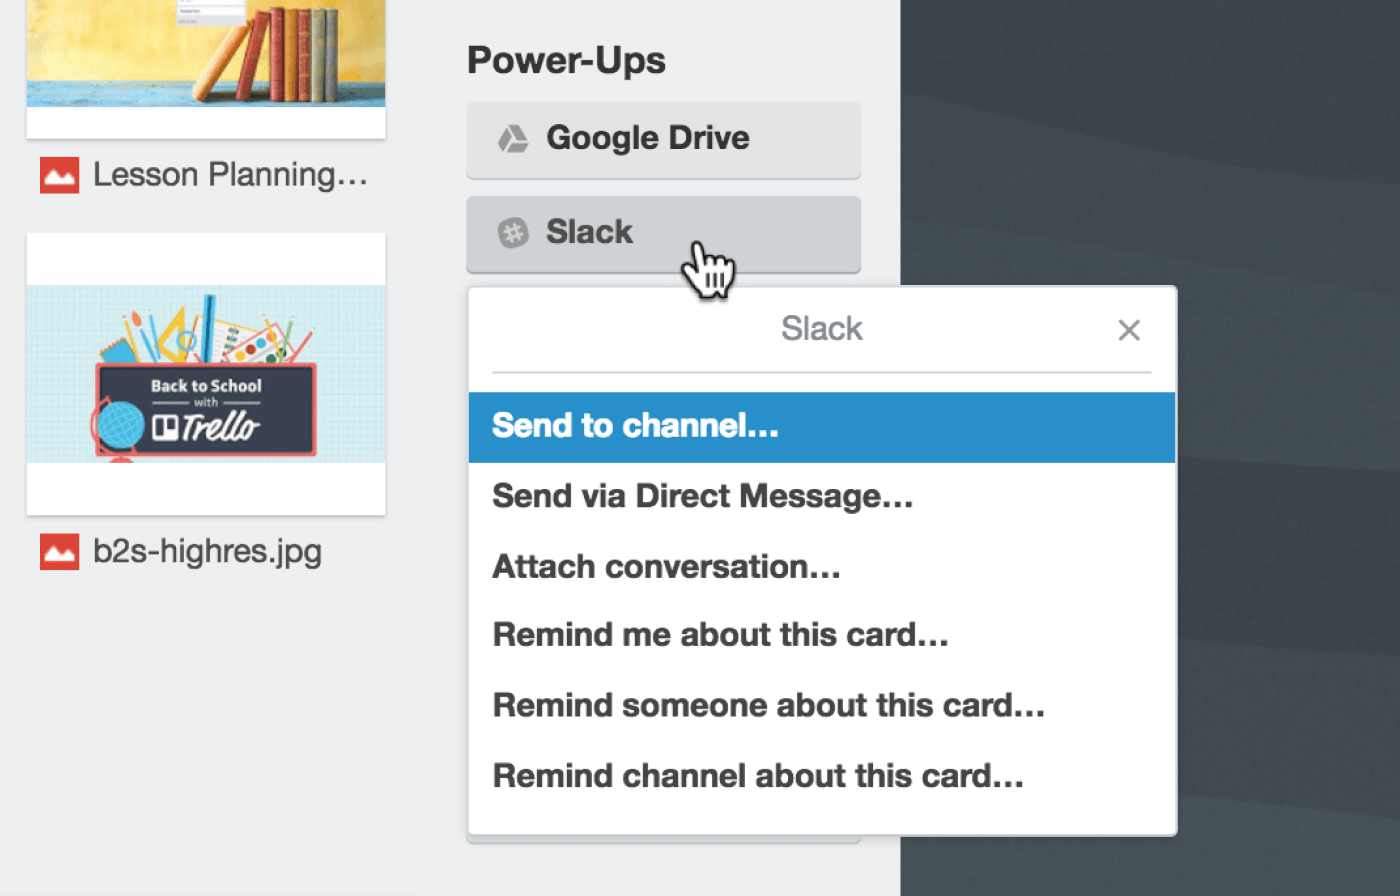
You definitely have a thought like: “What if we already have a messenger we love and don’t really want to leave it behind”? Then, we suggest testing integrations that are available almost for all popular messengers like Slack, Microsoft Teams, etc., so that no brilliant idea or important task falls through the cracks.
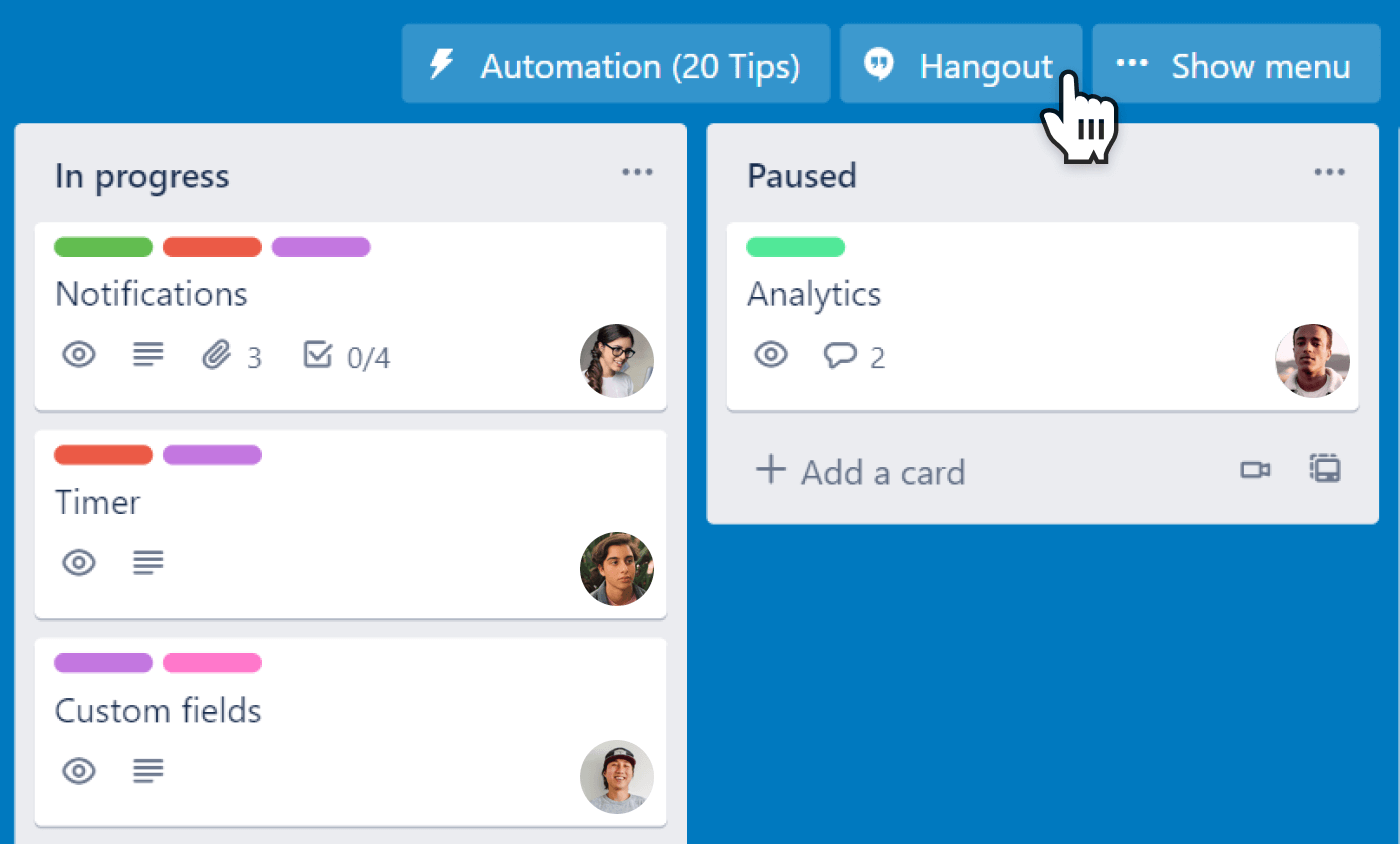
Arranging meetings with your team or customers is also an inevitable part of work life. Agree? So, it’s nice to know that such tools as Google Hangouts, Zoom, etc. could be integrated with Trello to jump on a video chat in a click. What’s more, it’s even possible to create dedicated chat rooms for different boards.
3 Closeout Stage
Bingo! You did it! After applauding all the work you’ve accomplished, it’s time to evaluate how your team was performing and indicate the things you did well and the things that are worth improving in the future.
Build Reports
The best way to analyze work is, no doubt, through reports. There are two ways you can do it: by exporting data to Excel or by overviewing dashboards.
Dashboard view will give you a new perspective on your project, making it easier to visualize key metrics, and evaluate results and performance. Instead of spending time on digging up the data and turning it into comprehensive information, you can start digesting meaningful insights straight away.
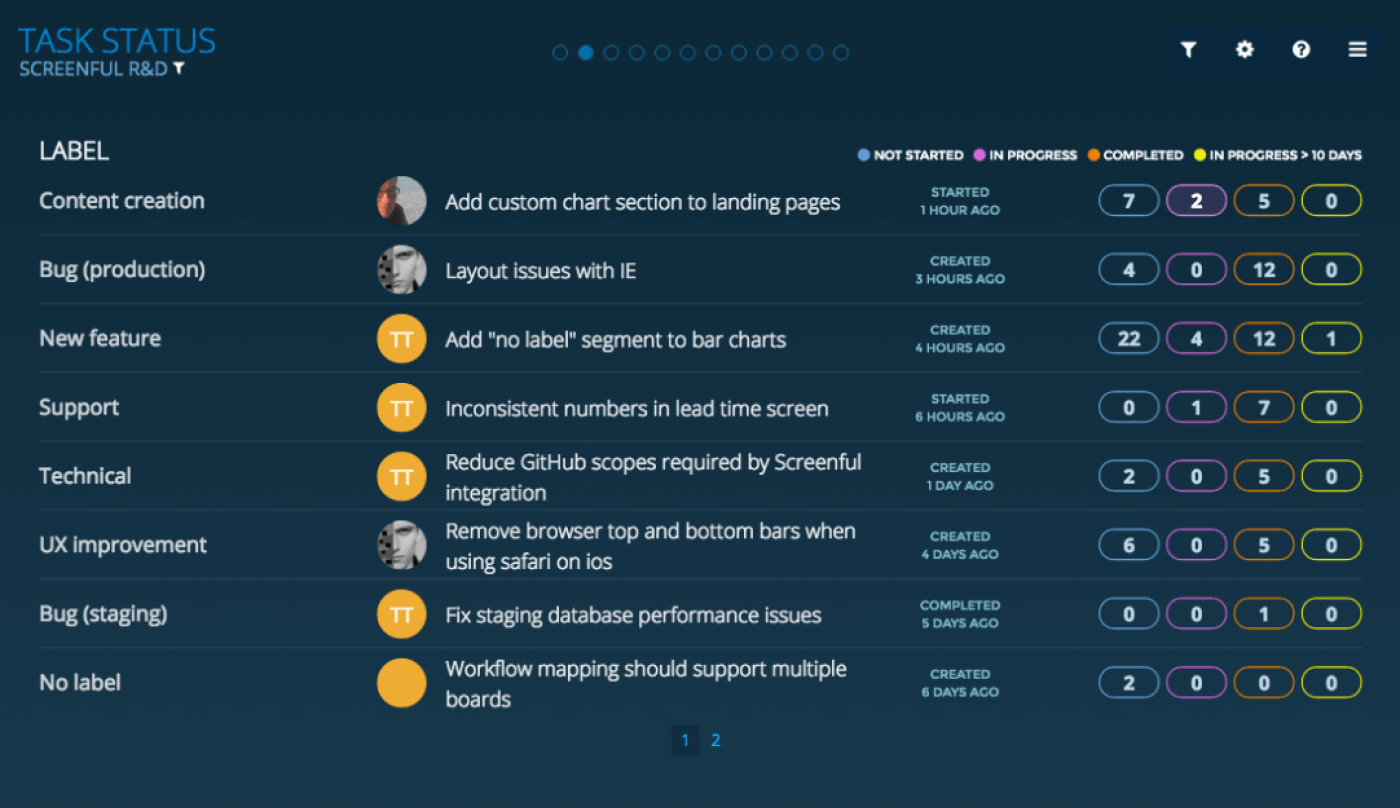
One of the most popular power-ups that are able to provide visual dashboards is Screenful. Apart from just giving you the idea of how your time is distributed on different activities before they are completed, this power-up lets you get the aggregated data across multiple boards by assignee, label, or priority. You can also track your progress with a burndown chart, as well as tracking releases to estimate delivery dates.
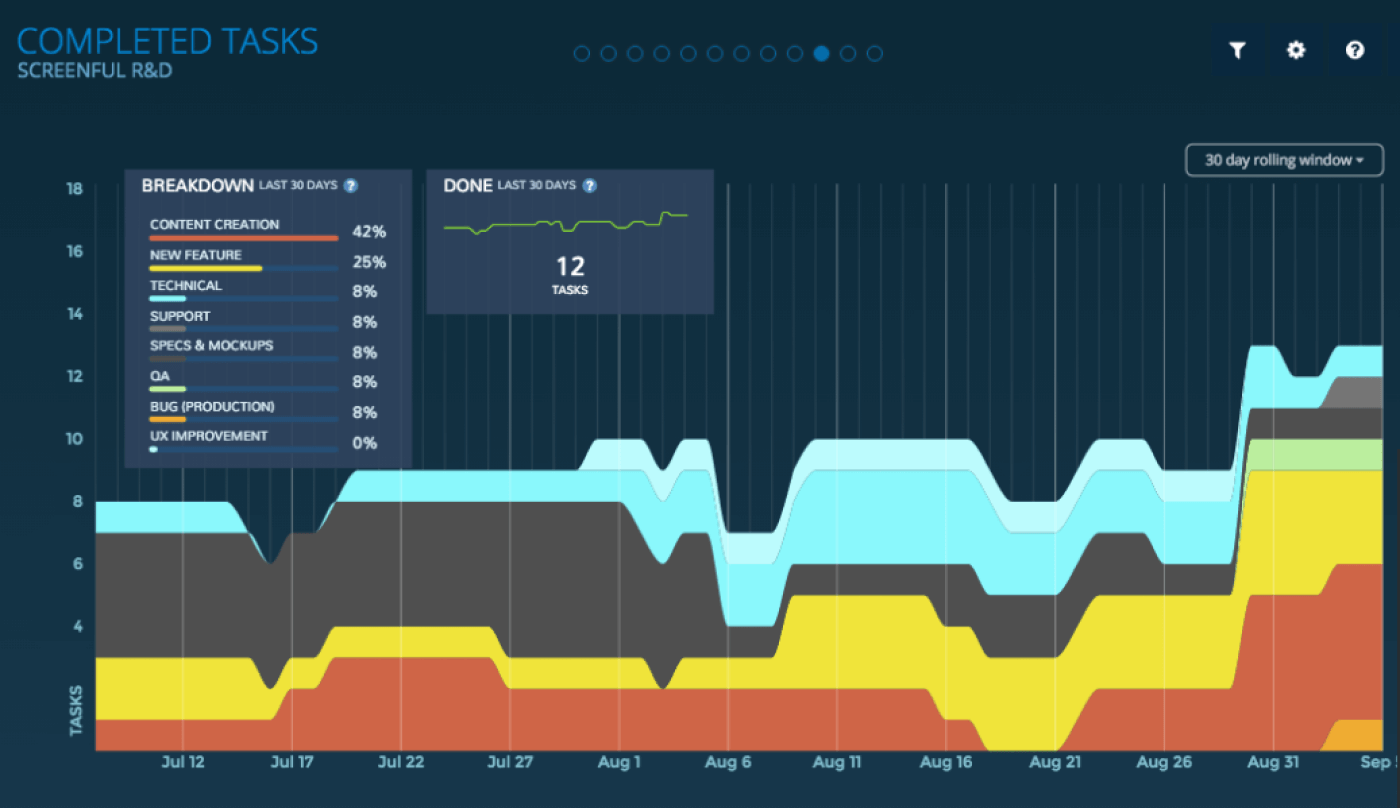
Except for standard dashboards, you get the possibility to build customs charts, share automated reports with non-Trello users, and even set the dashboard up on a big screen in the office with the TV mode. So, the tool is equally helpful for both the closeout stage and during implementation too.
Trello Best Practices
Now that we’ve come along all stages of project management together and saw how simple it is to get all you need in Trello, why not brush up on and perfect your workflow? Having Trello board examples in front of you will help you kick start quicker and make a board of your own.
Editorial Calendar Planning
- Make lists where you and your colleagues will add cards with your content ideas
- Split big content pieces into more manageable pieces
- Create labels that correlate with the type of media that it will be used for (blog post, video, article, etc.)
- Prioritize content pieces according to their importance and your content strategy
- Plan out a content schedule according to your team availability
- Check how tasks move stage from stage to make sure they will be published on time
Software Development
- Create and prioritize your backlog
- Plan out work in sprints with lists
- Set start and due dates for each feature, story, and task added to your sprint to see how your schedule fits together
- Make sure teammates are updating task statuses
- Highlight release days and all important milestones
Sales CRM
- Add all new leads to your CRM board
- Create a sales pipeline with lists and nurture your leads from stage to stage
- Get all your meetings and calls scheduled in one place
- Store all lead-related data in cards to access it any time you need
- Set up the follow-up process to ping your leads on time
Advanced Features: Multiple Views for Comprehensive Oversight
To leverage Trello for more advanced project management, consider utilizing the following features that enhance its capabilities beyond basic board visuazation:
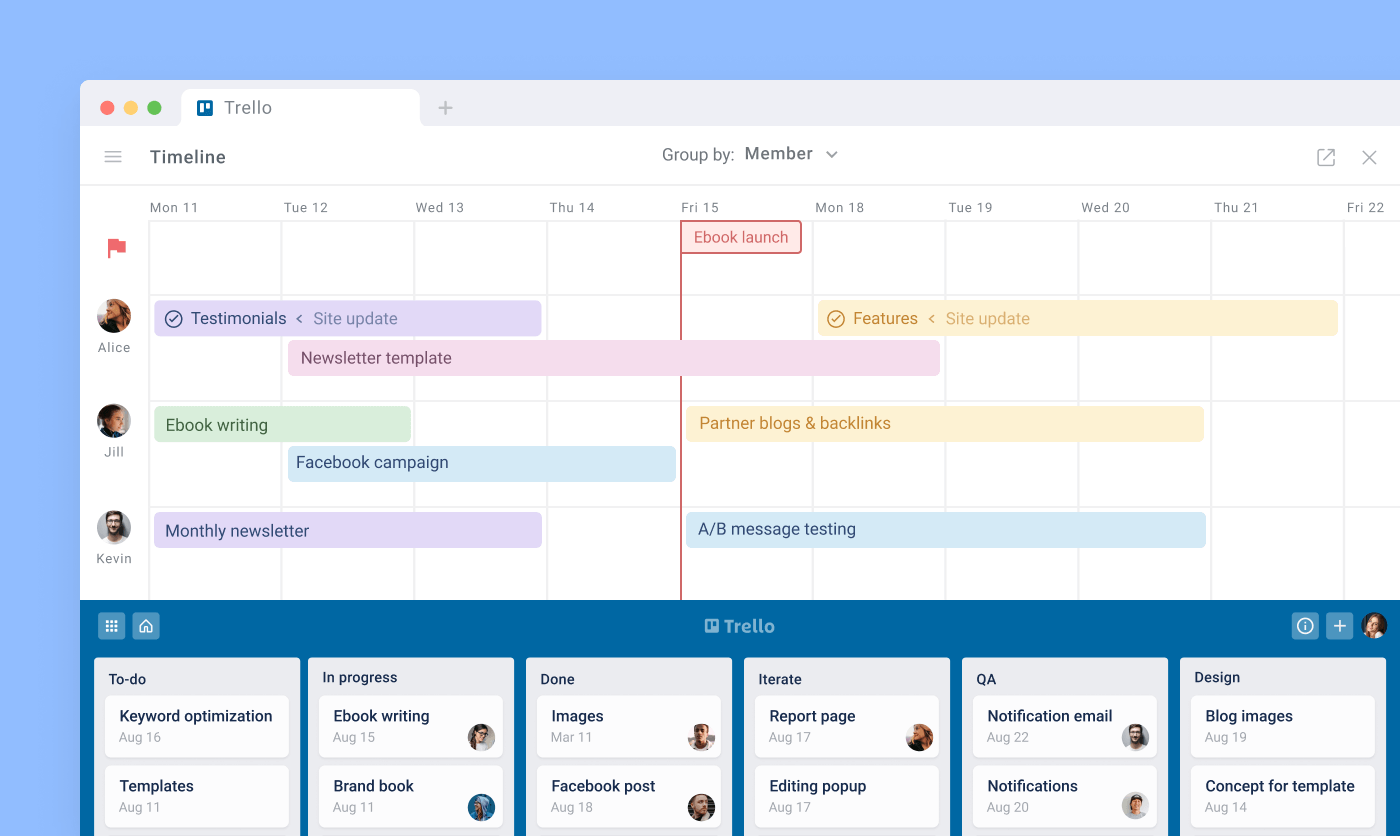
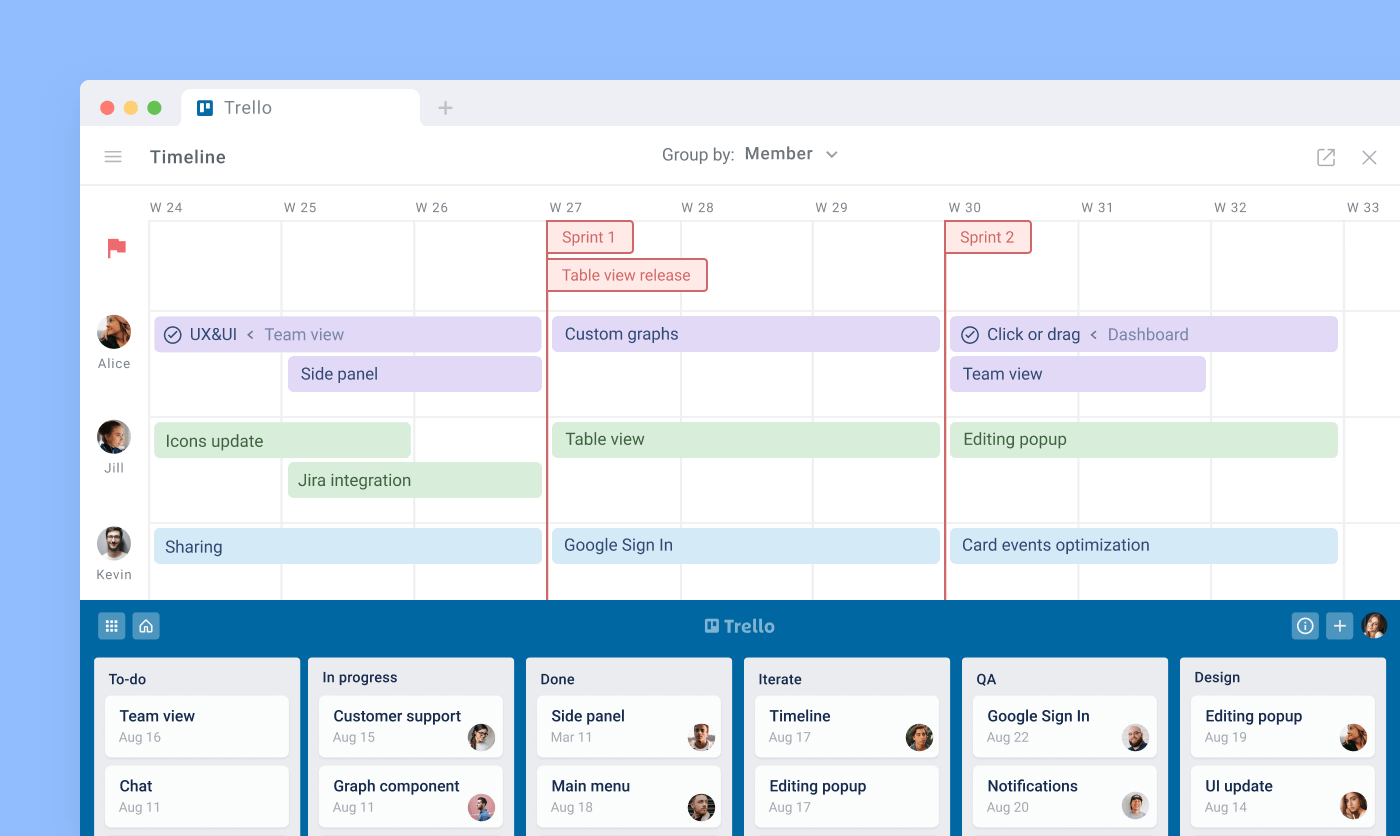
Trello Timeline
Trello's Timeline view helps in visualizing project plans over a timeline, making it easier to manage deadlines and dependencies. This view is particularly useful for planning long-term projects and tracking progress over time.
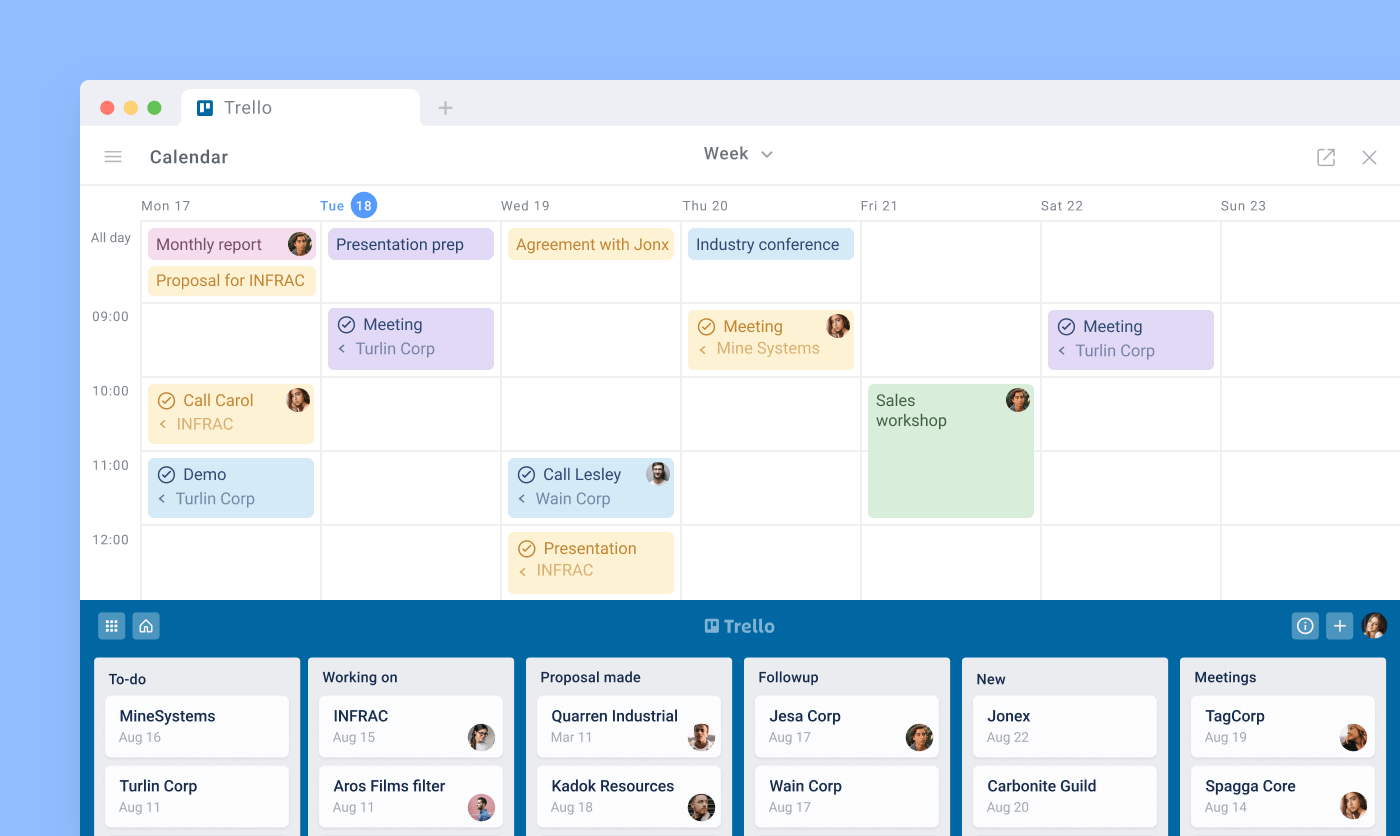
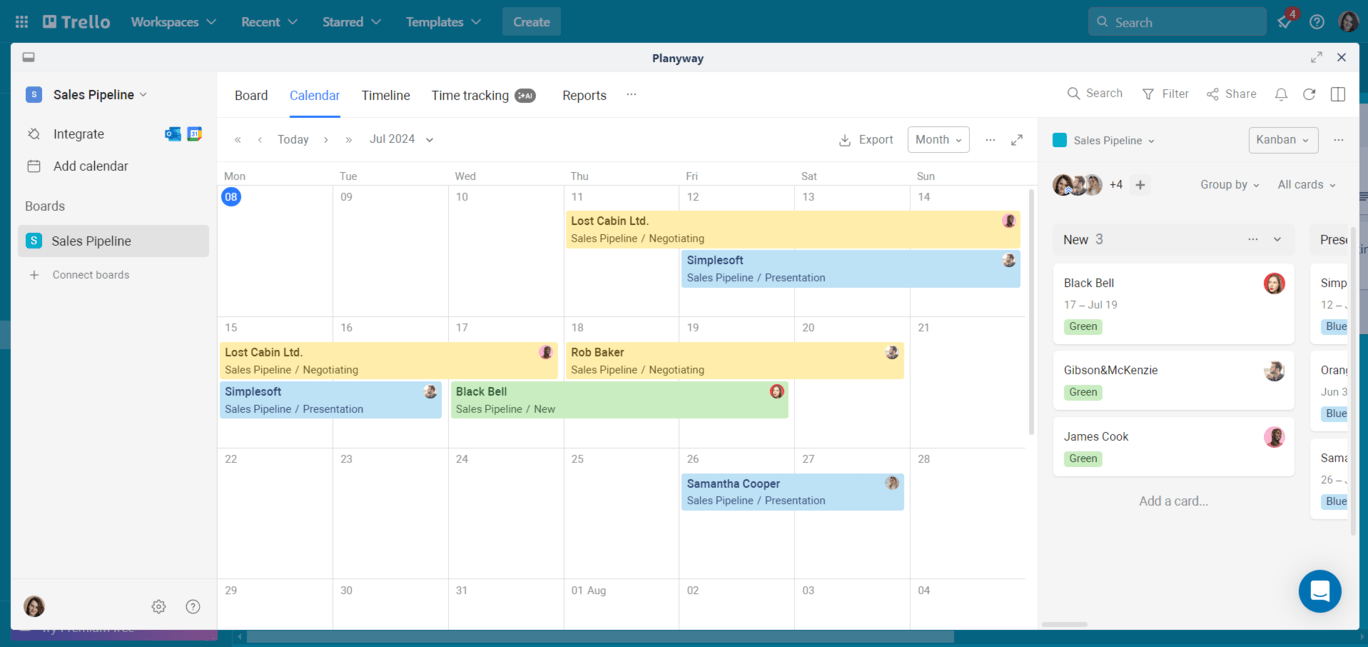
Calendar View
The Calendar view offers a date-based perspective on tasks, allowing teams to manage schedules and deadlines efficiently. This view is essential for coordinating project timelines and ensuring that all team members are aware of upcoming deadlines.
Dashboard View
Dashboard view aggregates key project metrics and visualizes them in charts and graphs, providing an at-a-glance understanding of project status and performance. This helps in making data-driven decisions and monitoring overall project health.
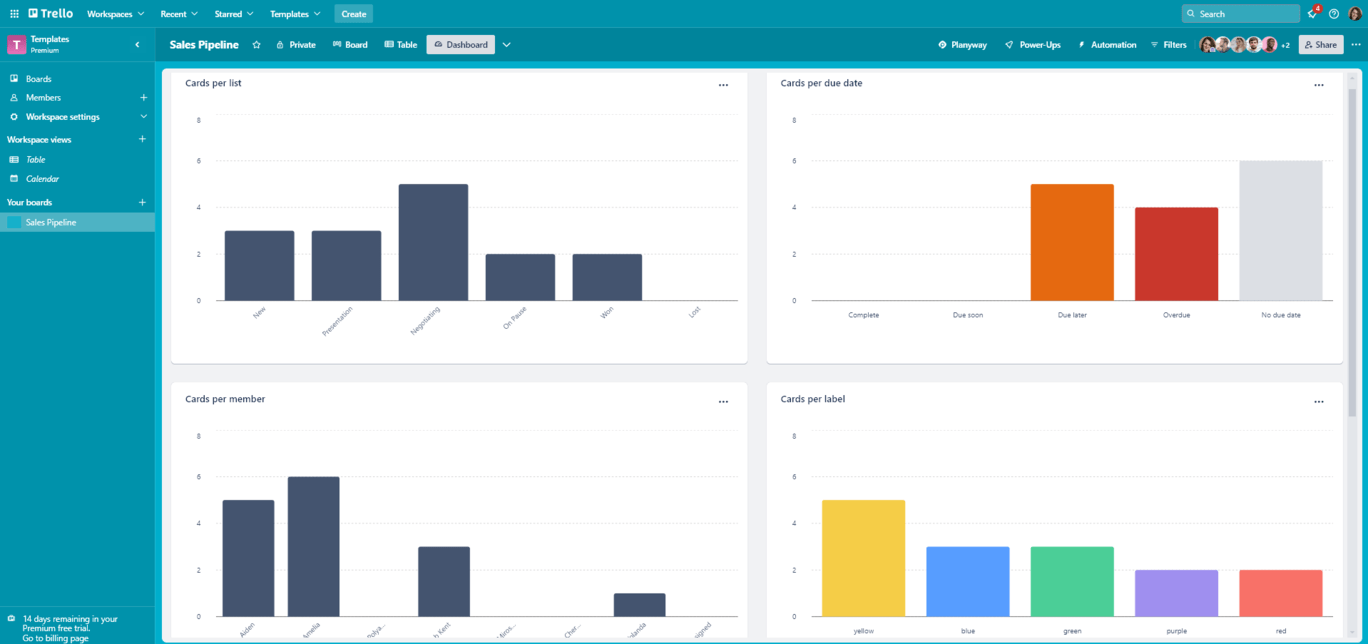
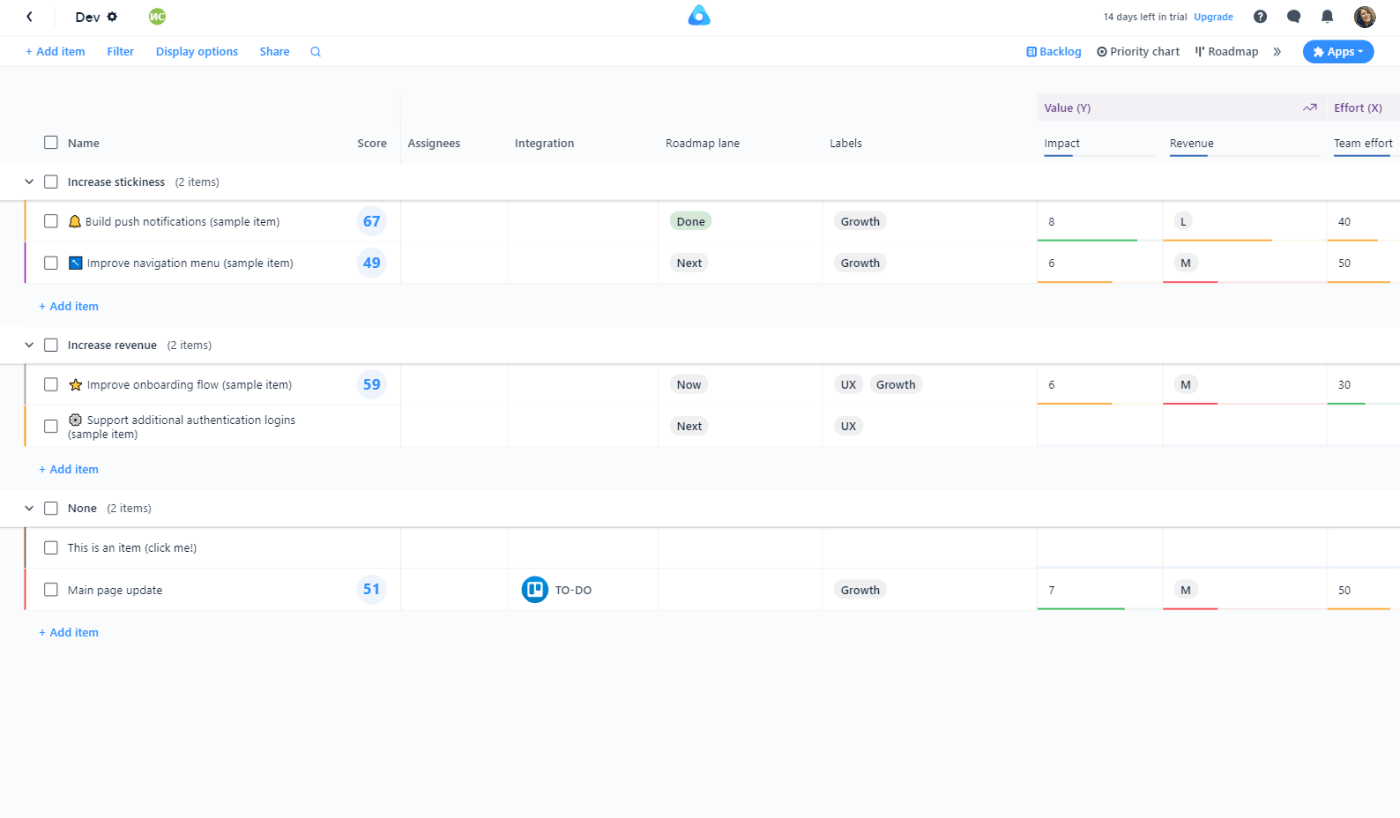
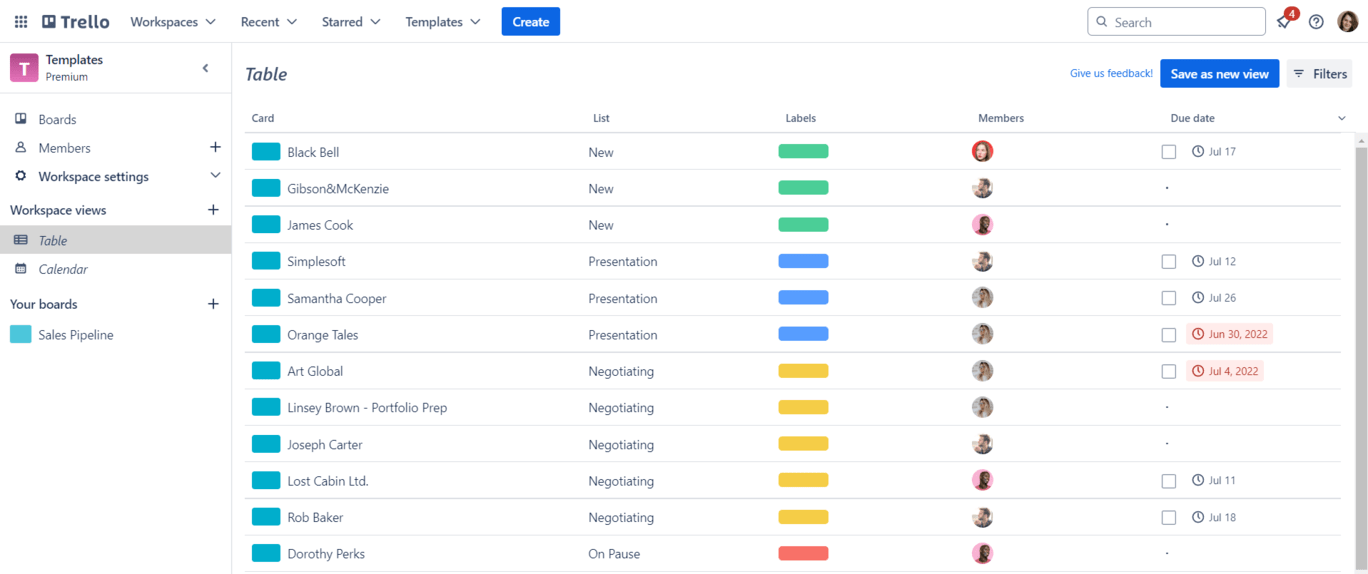
Table View
The Table view allows users to see tasks across different boards in a spreadsheet-like format. This is ideal for those who prefer a more structured, list-based approach to project management.
Hidden Gems: Best Trello Tips and Tricks
These tips and tricks will help you make the most of Trello, improving your productivity and project management efficiency.
Tip #1 Using Emails in Trello: Adding Cards from Emails
Trello provides several ways to integrate emails into your project management workflow. You can add cards directly from your email or add email text into existing cards, making it easy to keep track of important information and communications.
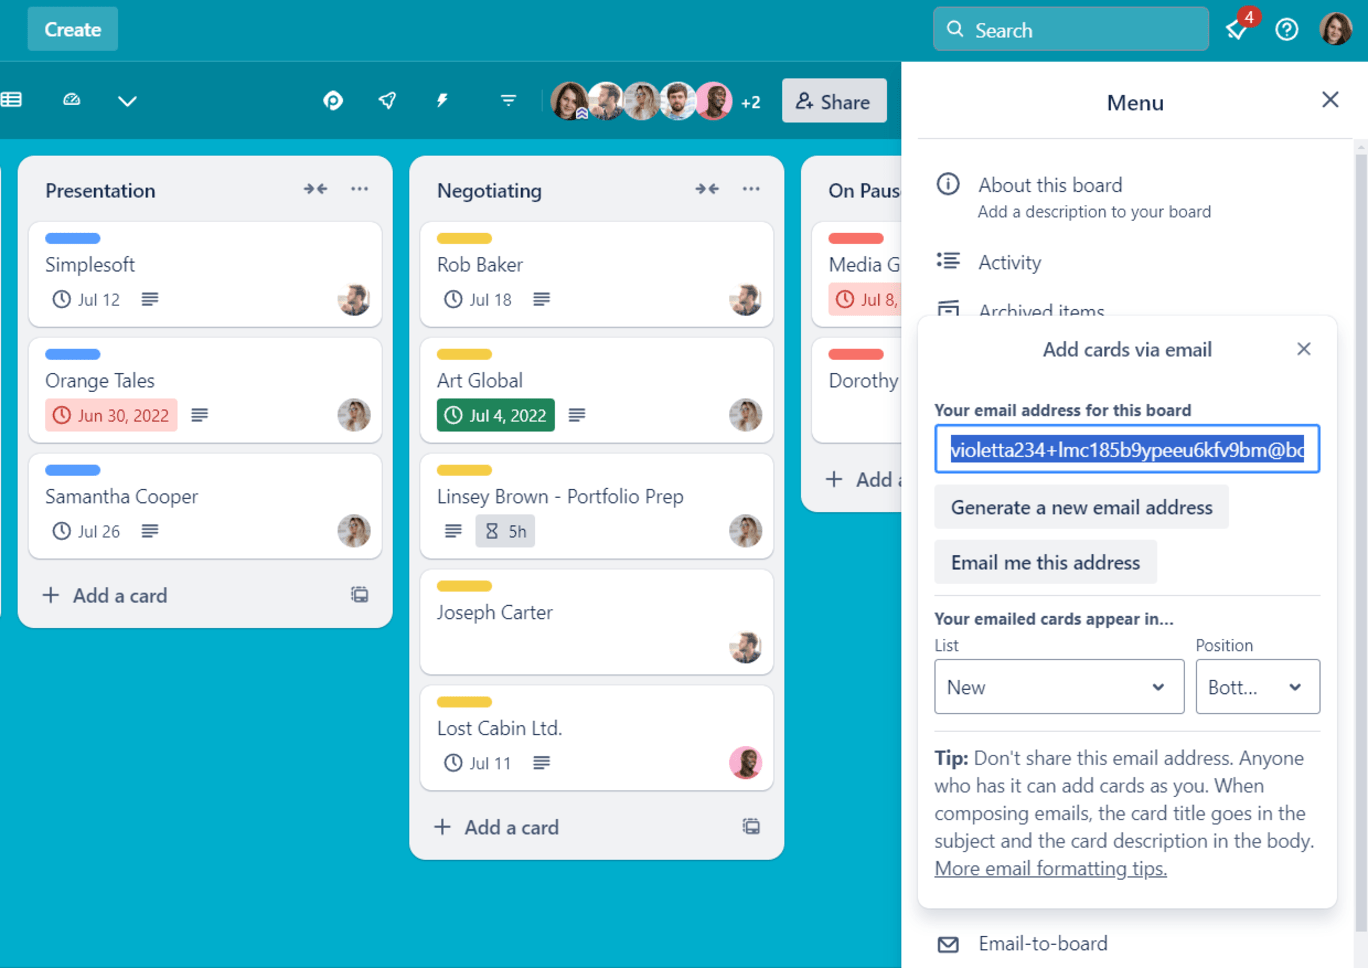
Each Trello board comes with a unique email address that allows you to create cards by sending an email to this address. To find your board’s email address:
- Open your Trello board.
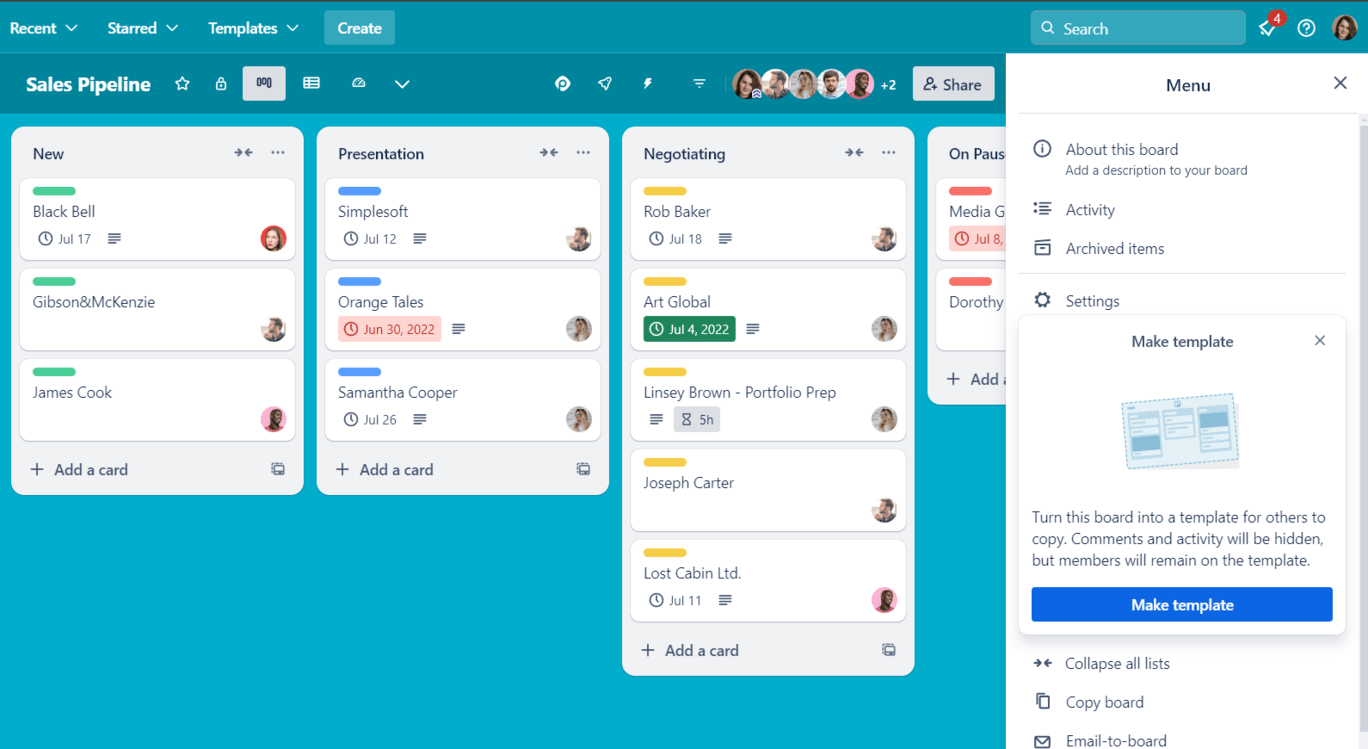
- Click on the “Show Menu” button on the right side of the board.
- Select “More” and then “Email-to-board Settings.”
- Here, you will see the email address for that board. You can copy this address and save it for future use.
You can customize where the new card created from an email will appear:
- Choose the list where new cards will be added.
- Select the position within the list (top or bottom).
When you send an email to your board’s email address:
- The subject of the email becomes the title of the card.
- The body of the email becomes the description of the card.
- Attachments in the email will be attached to the card.
- You can use hashtags (#) to add labels and at-mentions (@) to add members directly from the email.
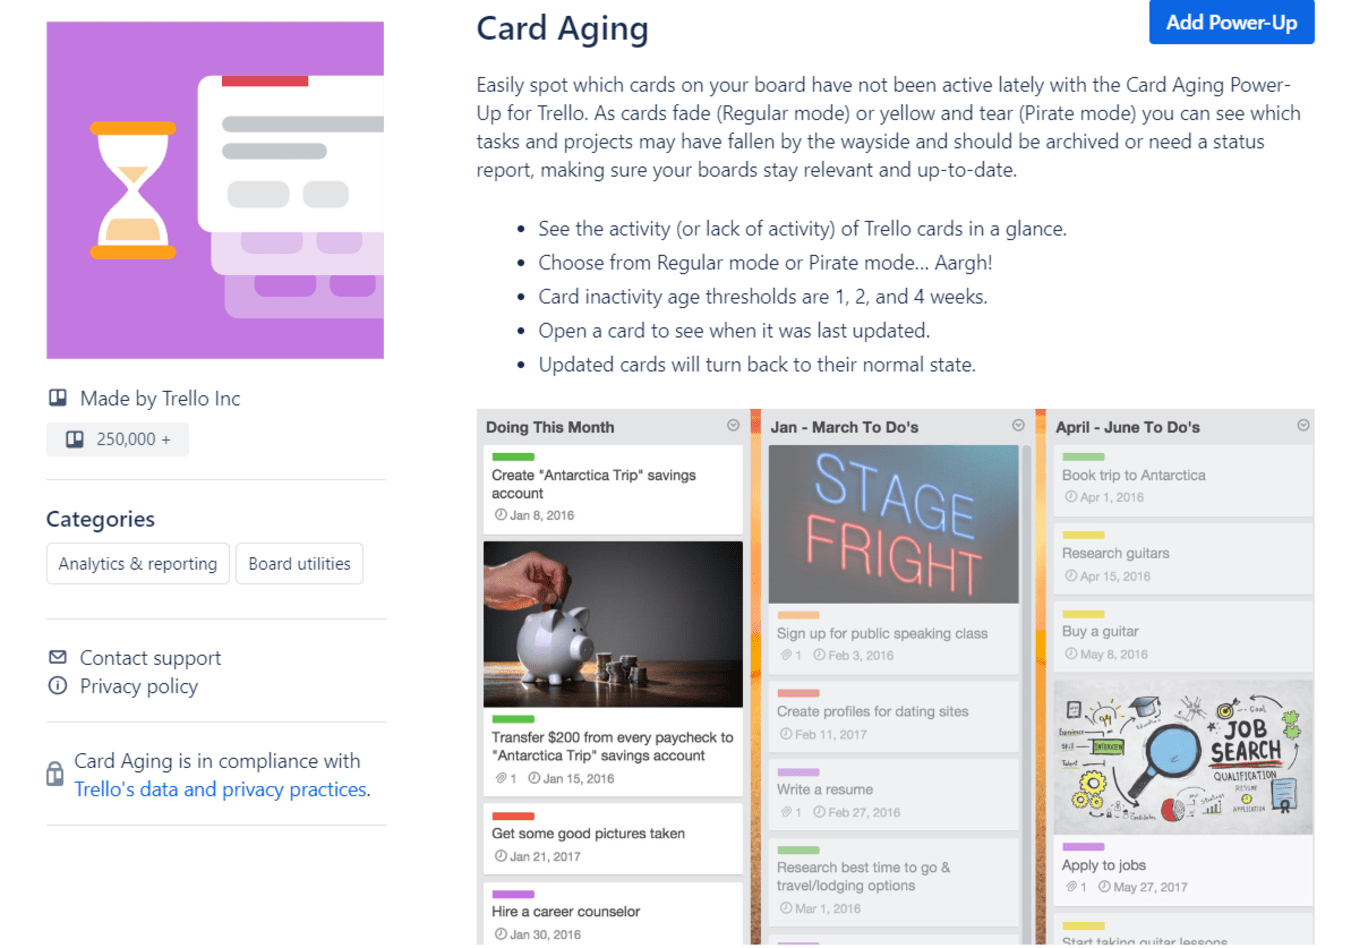
Tip #2 Highlight Inactive Cards
The Card Aging Power-Up in Trello is a visual tool designed to help users manage and prioritize tasks by highlighting inactivity on cards over time. This feature applies a visual overlay to cards that haven't been updated or moved within a specified period, using either Regular Mode, where cards gradually fade, or Pirate Mode, where they appear weathered and aged.
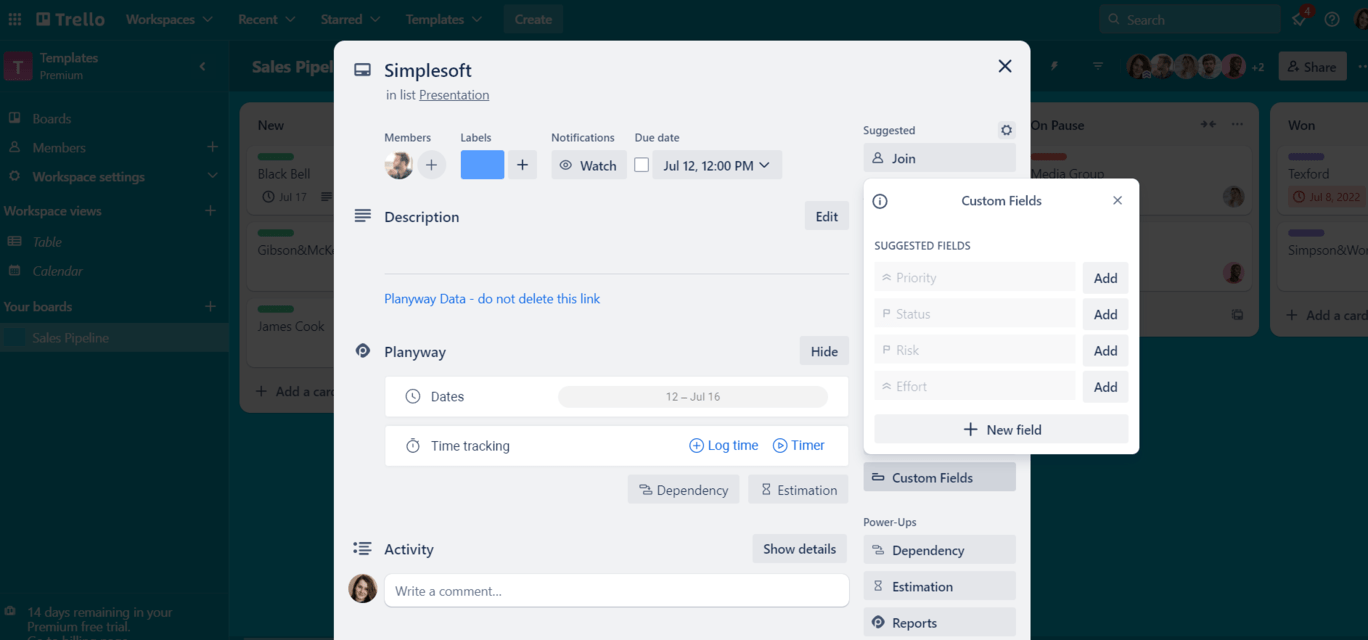
Tip #3 Custom Fields for Enhanced Card Details
Custom Fields allows you to add specific fields to your cards, such as text, numbers, checkboxes, dates, or dropdown lists. This feature is particularly useful for adding extra information or categorizing tasks in more detail.
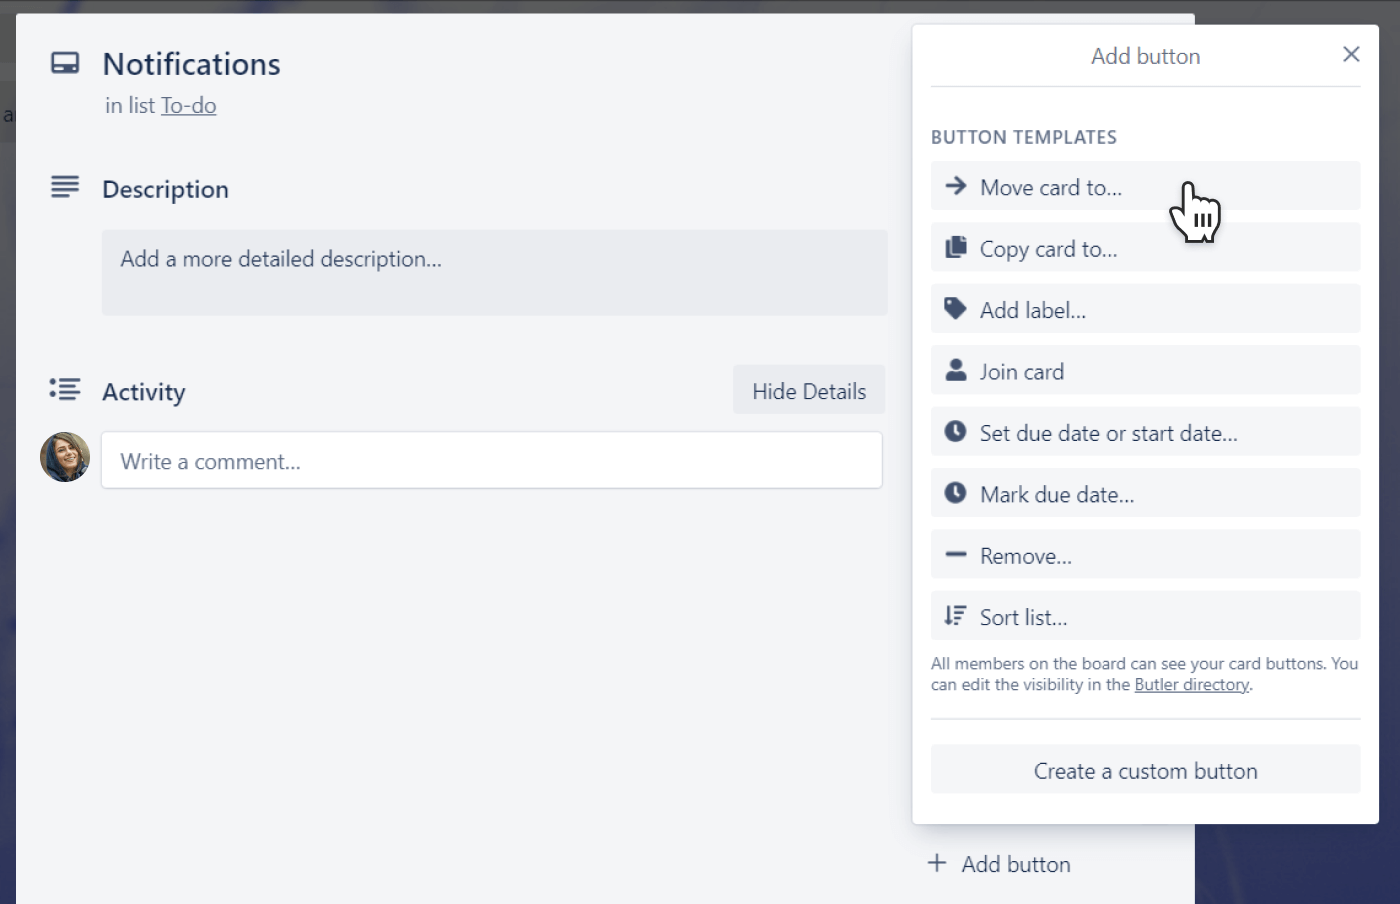
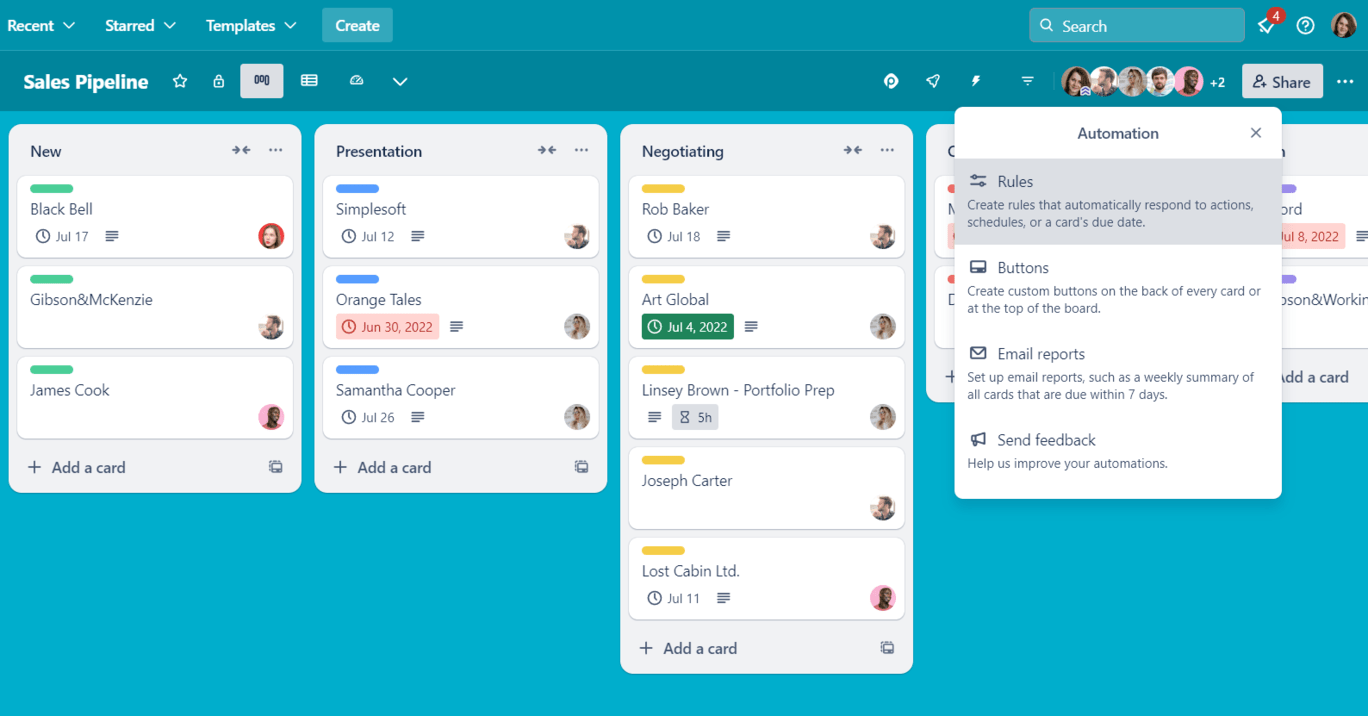
Tip #4 Automate Tasks with Trello Automation
Trello is able to automate repetitive tasks and workflows. You can create custom rules, buttons, and scheduled commands to streamline your process. For example, you can set a rule to move cards to a "Done" list when all tasks are checked off or automatically add a checklist to new cards.
Tip #5 Use Card Templates for Consistency
Card templates help maintain consistency and save time by allowing you to create standardized cards for recurring tasks. You can create a template card with all the necessary checklists, attachments, and descriptions, then duplicate it whenever needed.
Tip #6 Link Cards and Boards for Better Navigation
You can link cards and boards to each other for easy navigation between related tasks. This is useful for complex projects spanning multiple boards.
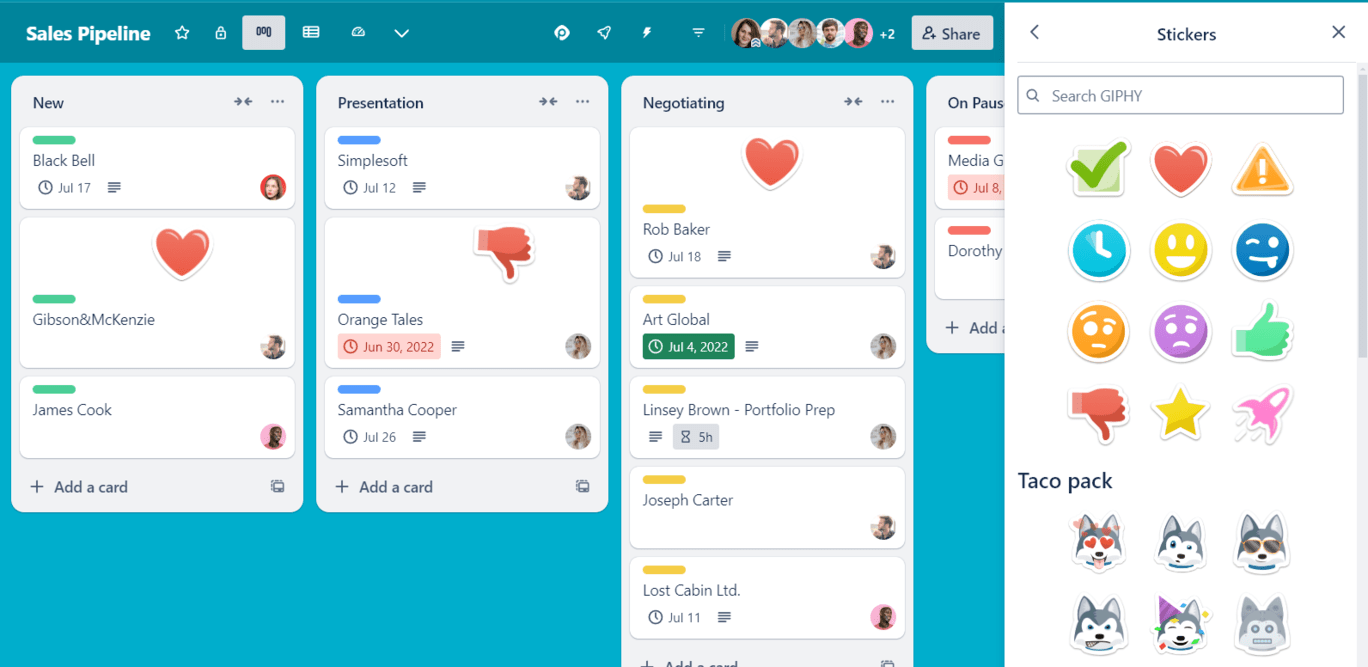
Tip #7 Use Stickers for Visual Categorization
Stickers are a fun way to add visual cues to your cards. You can use them to highlight important tasks, denote priority levels, or categorize types of work.
Tip #8 Search and Filter Cards Efficiently
Trello’s search and filter functions help you quickly find specific cards or subsets of cards based on criteria such as labels, members, due dates, and keywords. 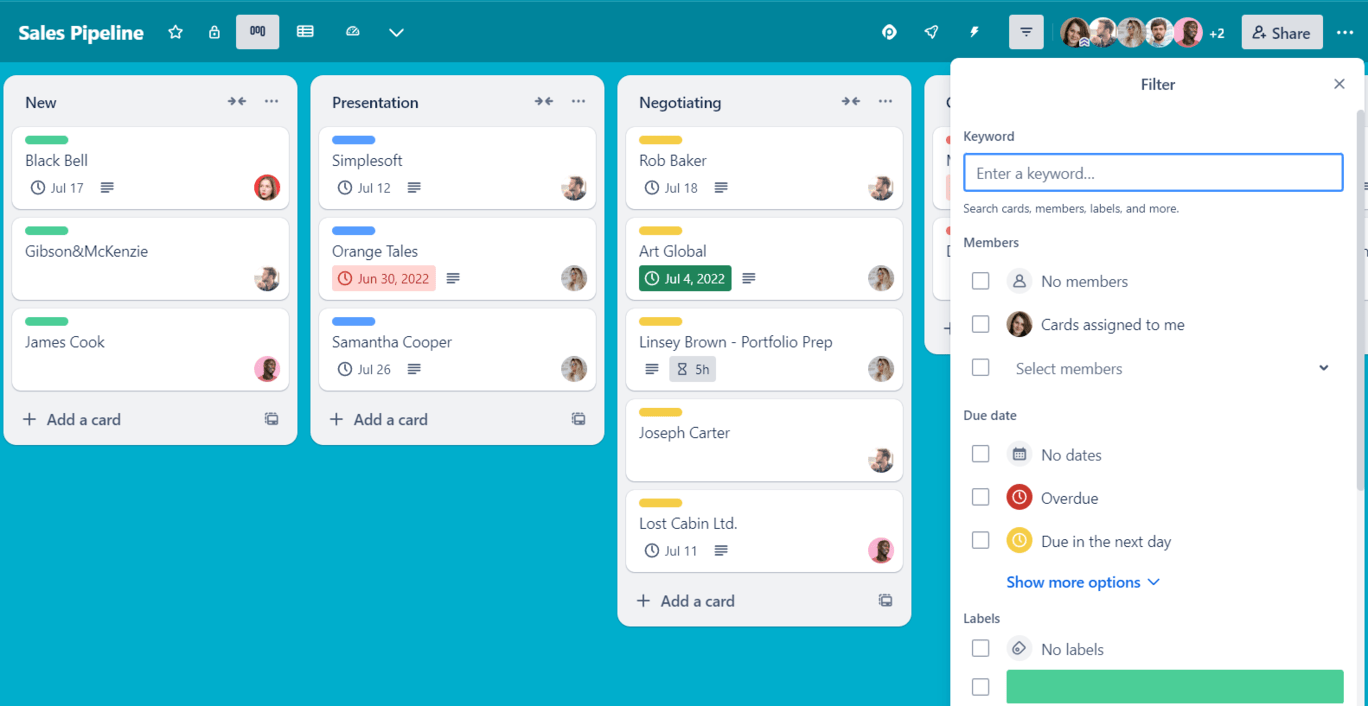
Tip #9 Archive Cards and Lists to Declutter
Archiving old cards and lists keeps your board uncluttered and focused. Archived items are not deleted and can be retrieved if needed.
Tip #10 Utilize Board Templates for Quick Setup
Board templates allow you to create new boards with pre-set lists, cards, and settings, saving time on setup. You can use templates for standard processes or project types.
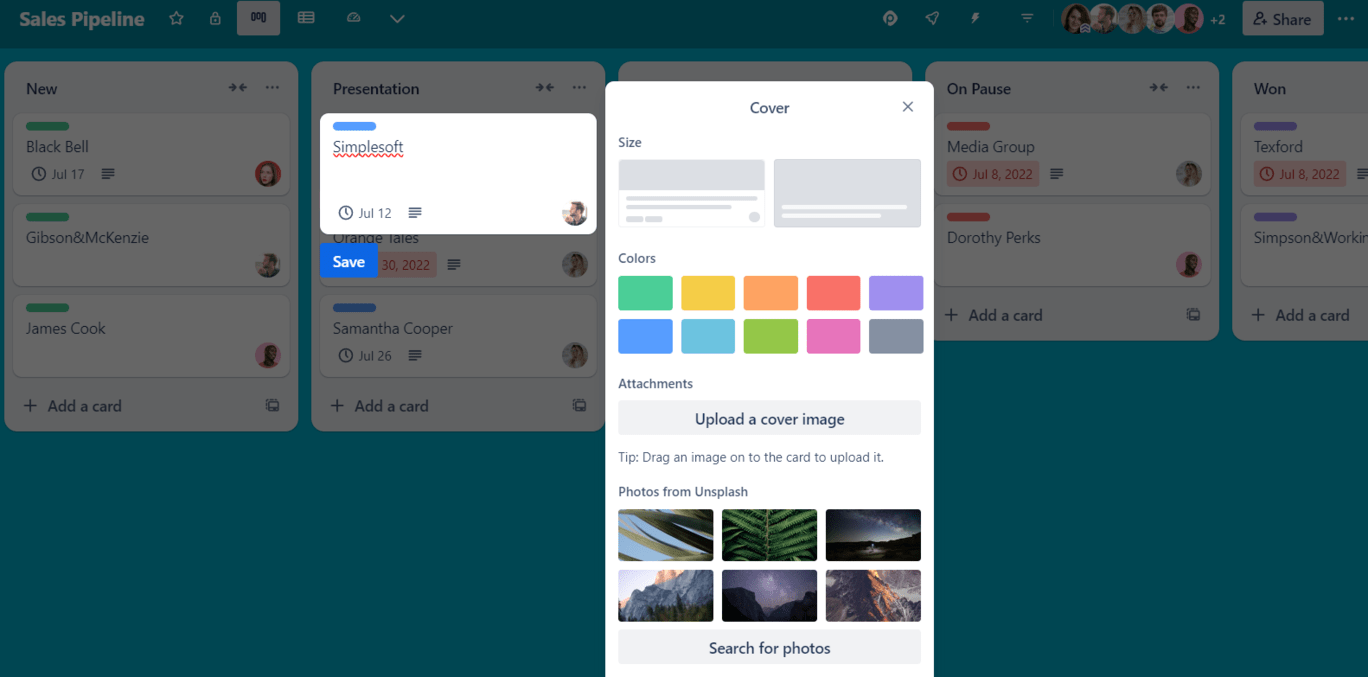
Tip #11 Track Progress with Card Covers
Card covers are large, colorful images or solid colors that appear on the front of cards, making it easy to visualize progress and status at a glance.
Final thoughts
Well, we’re finally at the endpoint of our walkthrough and hopefully, we shared all you need to know to start the path of project management in Trello. So, now it’s your turn to put it all into action and build up the perfect work process solely with Trello or with the help of Trello integrations.
If you ever encounter issues with Trello, check the current status of Trello. Visit Trello Status for real-time updates on its operational status and any ongoing issues. This can help you determine if the difficulties you're experiencing are individual or affecting all users, allowing for better planning and communication within your team.
